IEXT project items
Creating a new IEXT project can be done by selecting options from the File menu or by selecting the Create tab (1) as shown in Fig. 1.
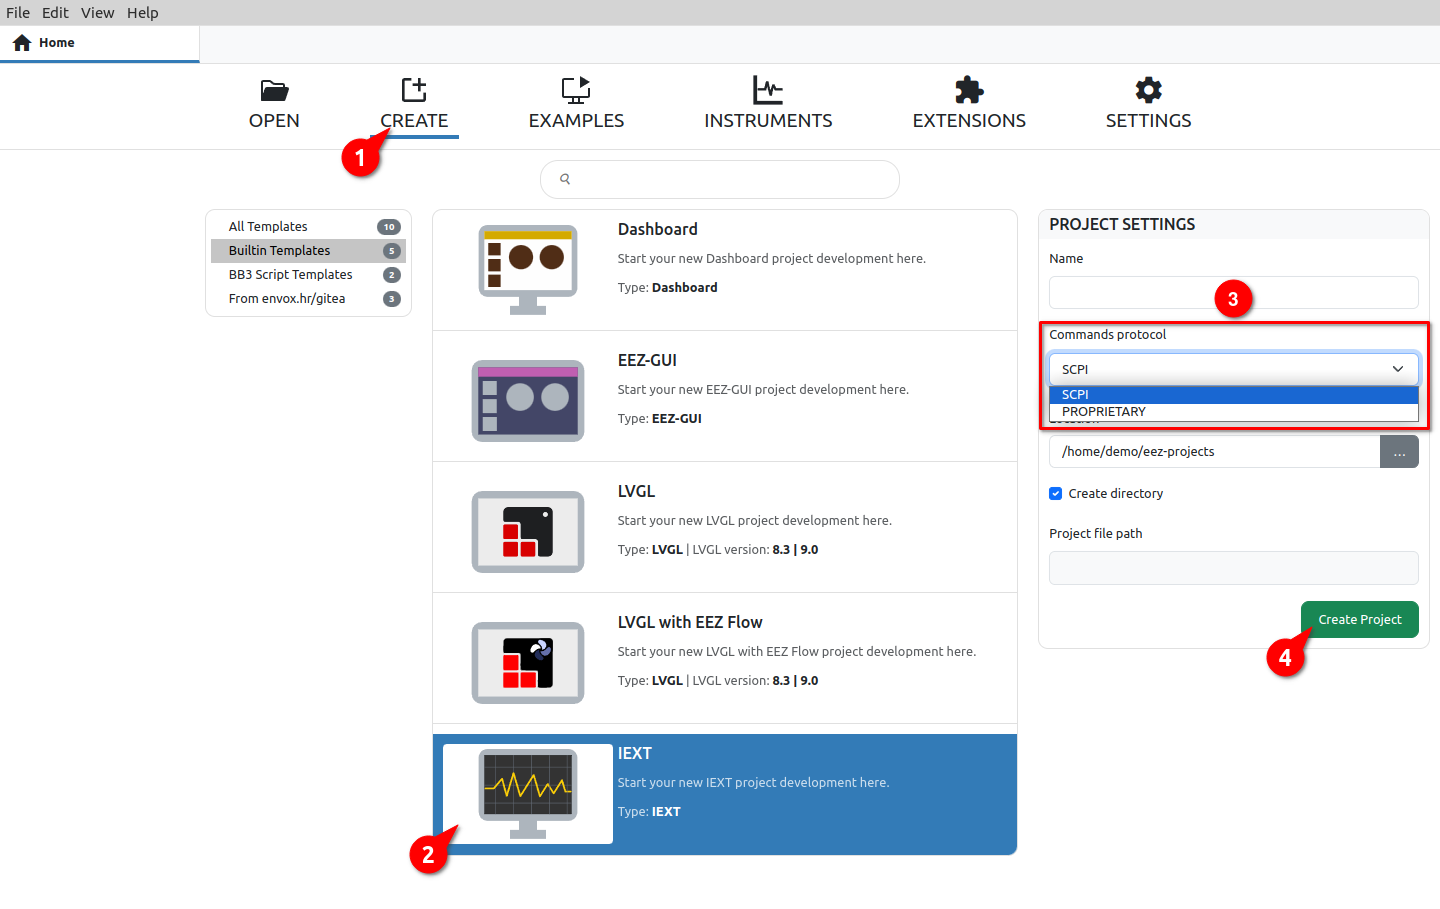
Fig. 1: Select New project option
We need to select the IEXT project template from the list of Built-in templates (2). In the Project settings section, we need to specify the name, type of commands protocol (3), location and then click on the Create Project button (4).
The EEZ Studio project items are organized into the following sections:
- Settings
- Extension definitions
- Subsystems
- Shortcuts
IEXT project – Settings
A newly created IEXT project contains only the basic items in the Settings tab organized into General and Build sections. Depending on which Commands protocol is selected, IEXT settings will look like in Fig. 2. or Fig. 3.
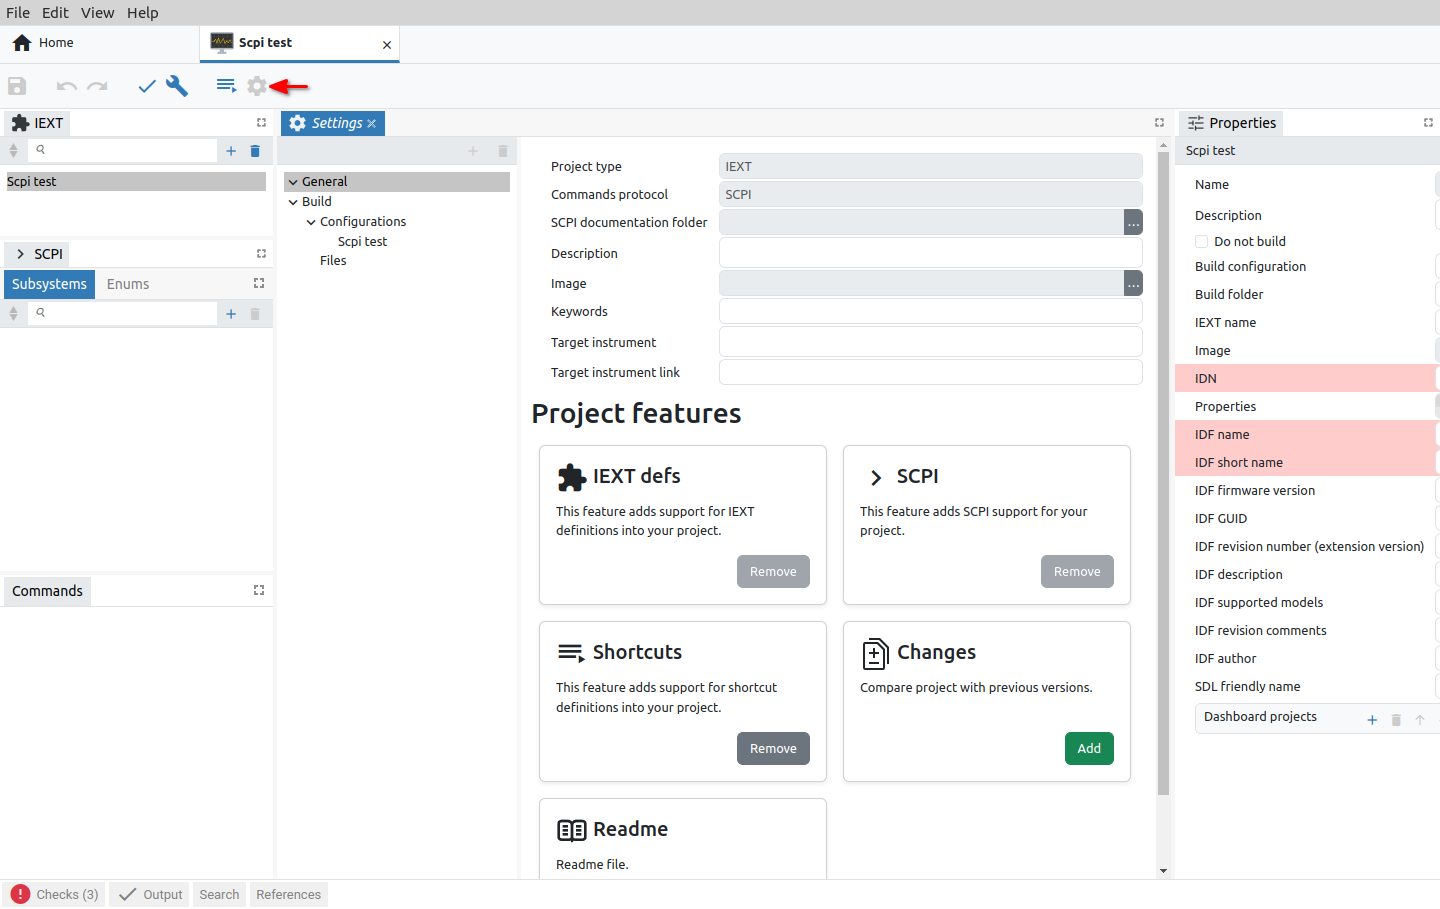
Fig. 2: Settings tab for the newly created project (SCPI)
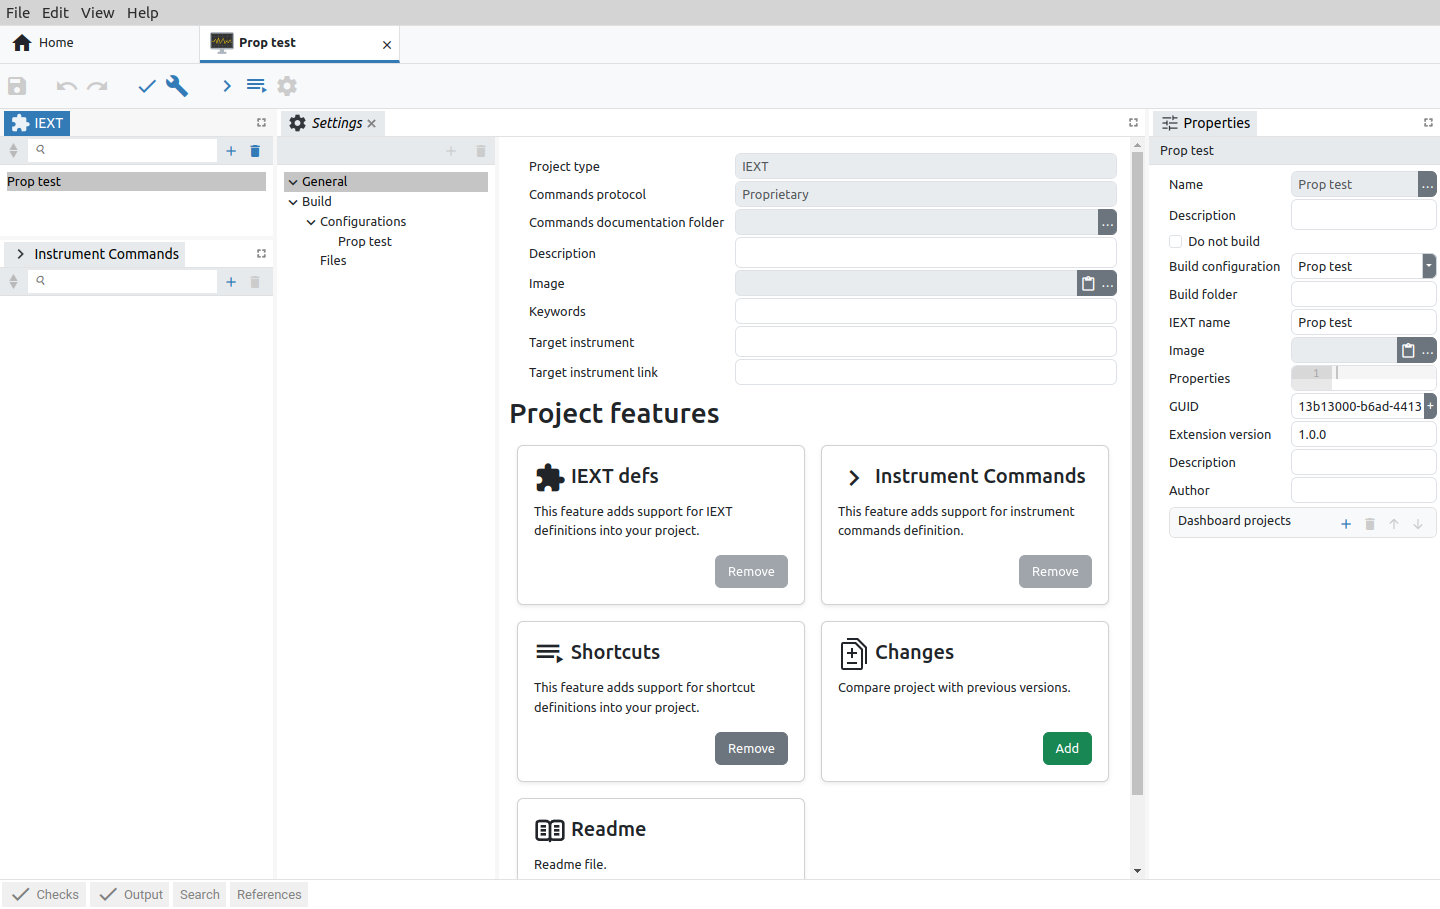
Fig. 3: Settings tab for the newly created project (Proprietary)
|
Item |
Description |
|
Project type |
The project type is always IEXT and the type parameter cannot be changed. |
|
Commands protocol |
SCPI or Proprietary. |
|
SCPI documentation folder (SCPI only) |
SCPI help HTML files folder. The recommended path to the SCPI help HTML files is doc subfolder in the folder where project file has been saved. |
|
Commands documentation folder (Proprietary only) |
Instrument commands help HTML files folder. The recommended path is doc subfolder in the folder where project file has been saved. |
|
Description |
Description of the project (1) as it will be displayed in the Examples list shown in Fig. 4. |
|
Image |
Project Image (2) as it will be displayed in the Examples list shown in Fig. 4. |
|
Keywords |
Project Keywords separated by space (3) as it will be displayed in the Examples list shown in Fig. 4. |
|
Target Instrument |
Project target instrument description (4) as it will be displayed in the Examples list shown in Fig. 4. |
|
Target Instrument link |
Project target instrument link to external additional information (5) as it will be displayed in the Examples list shown in Fig. 4. |
Fig. 4: Project details in Examples list
The Build section contains Destination folder path where IEXTs will be created. The project file folder is defined by default as shown on Fig. 5.
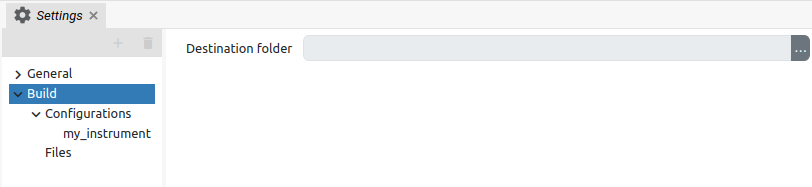
Fig. 5: Build destination folder
The Build sections also contains Configurations and Files subsections while Files is still not used for building an IEXT. Configurations sections for a newly created project include only Default configuration which can be renamed is necessary. The Configurations is used to define parameters that is shared between more instruments within the same family, for example, the rigol_ds_mso_1000 IEXT includes four configurations as shown on Fig. 6.
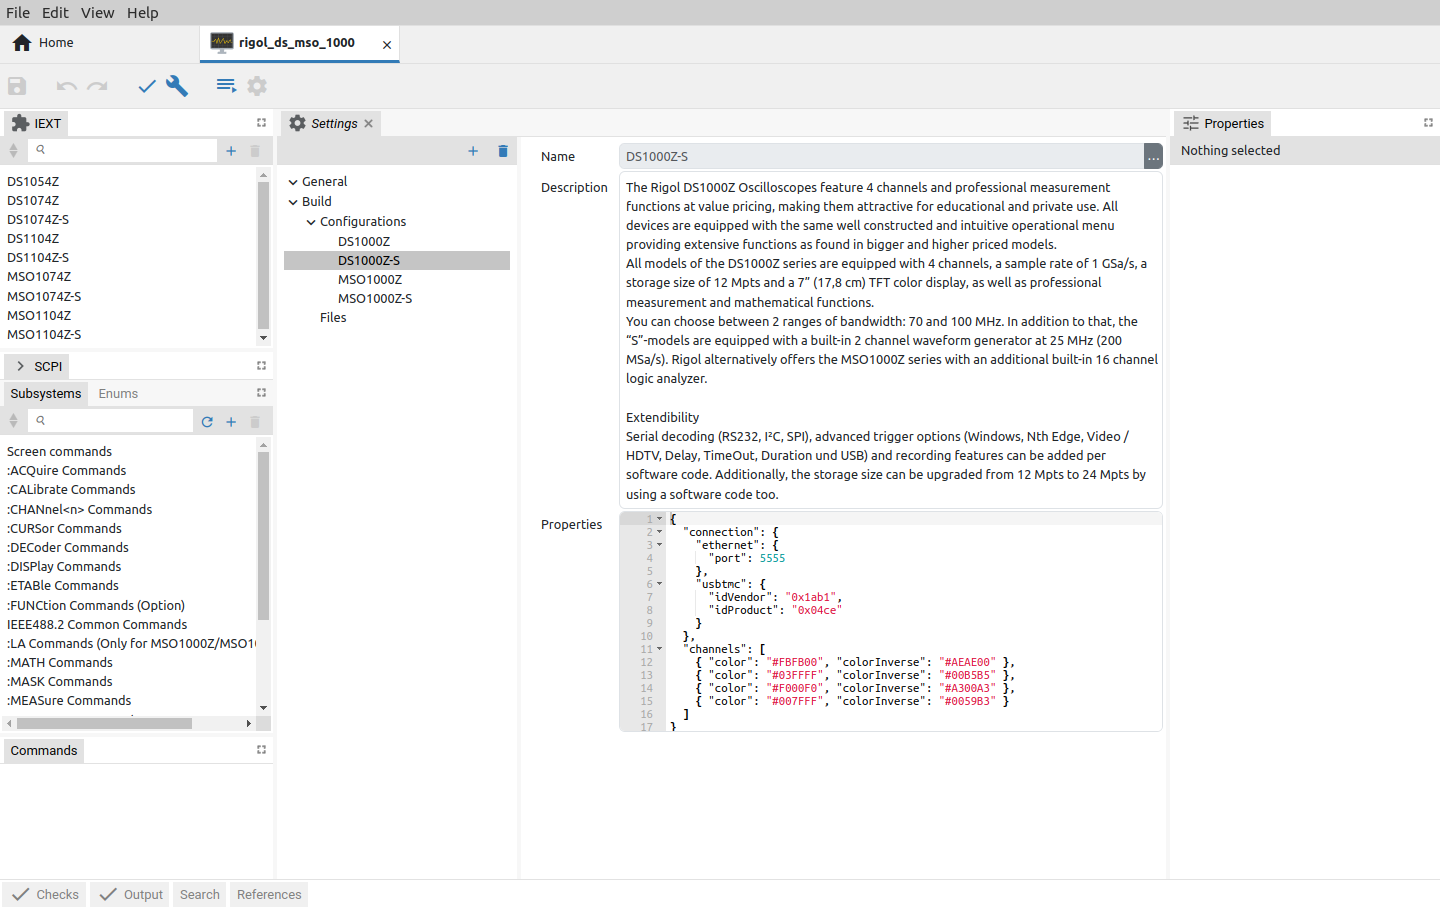
Fig. 6: Multiple Build configurations example
The Configuration items are as follows:
|
Parameter |
Explanation |
|
Name |
Configuration name that describe e.g. instrument family, or group of instrument models with the same feature within the same family. For example, the same Rigol DS1000 series instruments exists in two variants with signal generator installed (-S model) or without signal generator. Consequently model with additional feature comes with more SCPI commands. Creating two configurations give us possibility to select what SCPI command set is supported in one or another model even if SCPI commands are located in the same SCPI help file (chapter). The process of how to assign SCPI command help to one or more instruments will be described later in Project file Subsystems chapter. |
|
Description |
Additional information about the configuration, e.g. manufacturers promotional text of the instrument family. |
|
Properties |
Various Instrument configuration parameters. If defined they will override default IEXT values. |
There is no limitation in number of Build Configurations, and at least one has to be defined. Configuration adding and removing can be accomplished using options shown on the Fig. 7.
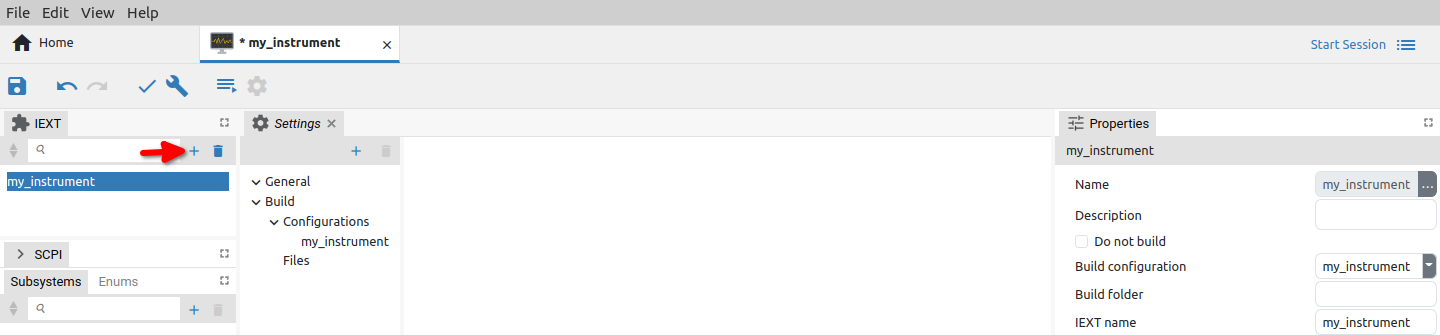
Fig. 7: Build configuration Add and Remove options
IEXT project – Extension definitions
The specific instrument model/type within a larger family of instruments, that is possible to define as Build configurations and described under Settings section, is defined under Extension definitions tab. A newly created project does not contain any instrument definition. Use Add option to create as many different instruments as needed (Fig. 8.).
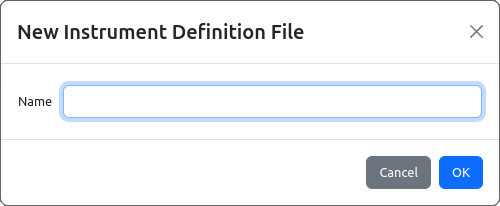
Fig. 8: Add new instrument definition
A newly added instrument definition (1) as shown in (Fig. 9) will produce few error caused by automated checking mechanism (2). Reported errors pointed to the mandatory fields (3).
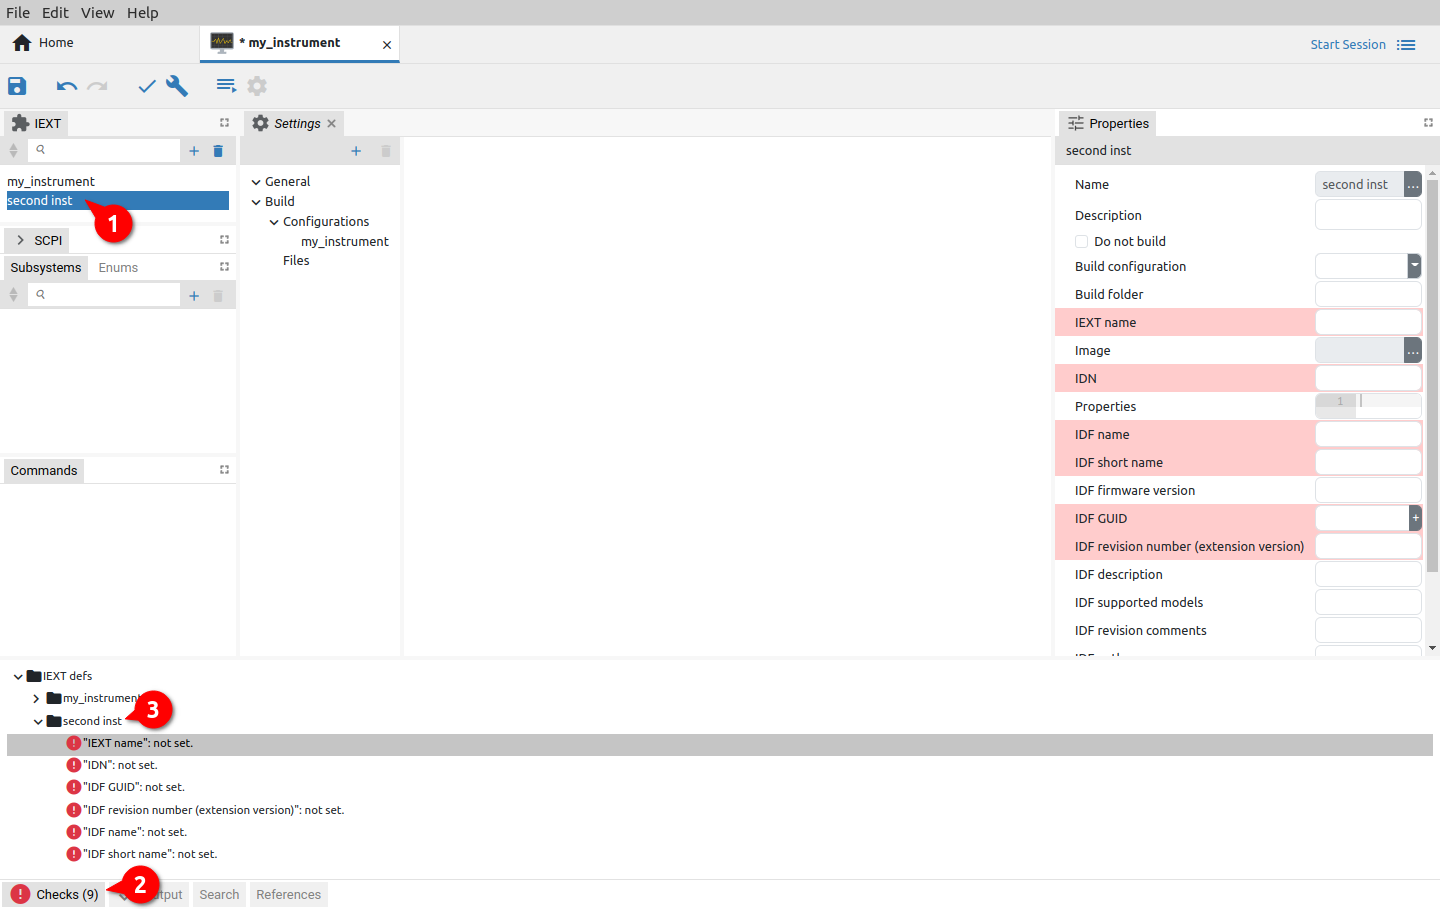
Fig. 9: Empty instrument definition errors
The Extension definitions has the following parameters (mandatory parameters are marked bold) that follows the Instrument definition file (IDF) structure of Keysight’s Offline Command Expert command set:
|
Parameter |
Explanation |
|
Name |
Instrument name, has to be unique. |
|
Description |
Instrument specific description that will be displayed together with Build Definition description as specified in Settings section. |
|
Do not build |
Exclude instrument from collection that will be made during the IEXT building process. |
|
Build configuration |
List of all build configuration defined in Settings section. |
|
Build folder |
Destination folder when IEXT will be build. Default value is empty for using the same folder as the project file. |
|
IEXT name |
Target IEXT .zip file name, for example rigol_mso1104zs is used to create rigol_mso1104zs_xxx.zip where xxx is defined by IDF revision number. |
|
Image |
Instrument picture that will be displayed in EEZ Studio for easier instrument recognition. If not specified a default “image no selected” thumbnail will be used. Recommended folder for instrument images is doc/images. |
|
IDN (SCPI only) |
Identification string that contains manufacturer name, followed by model name that is expected at the beginning of the received result from *IDN? Query (e.g. RIGOL TECHNOLOGIES,DS1054Z). |
|
Properties |
Instrument specific properties, if specified will override Properties defined in the Build configurations described in Settings section (e.g. instrument specific color scheme). |
|
IDF name (SCPI only) |
Instrument name, used also as instrument display name. |
|
IDF short name (SCPI only) |
Instrument short name, not used by EEZ Studio, but it is stored into IDF file (part of the IEXT .zip package). |
|
IDF firmware version (SCPI only) |
Instrument firmware version. |
|
IDF GUID / GUID |
Instrument’s GUID (Globally Unique Identifier). A new value will be generated each time when accompanied “+” option is selected. |
|
Revision number that is used as IEXT .zip file suffix and to distinguish between more IEXT’s revision of the same instrument. |
|
|
IDF description (SCPI only) |
Instrument information that will be displayed next to instrument name in EEZ Studio IEXT list (e.g. 70 MHz Digital Oscilloscope for Rigol DS1074Z model). |
|
IDF supported models (SCPI only) |
Supported instrument models, not used by EEZ Studio, but it is stored into IDF file (part of the IEXT .zip package). |
|
IDF revision comments (SCPI only) |
Additional revision information (e.g. what’s new, etc.). |
|
IDF author / Author |
Information about IEXT author (e.g. Envox for EEZ instruments). |
|
SDL friendly name (SCPI only) |
Instrument friendly name, not used by EEZ Studio, but stored into SDL file (part of the IEXT .zip package). |
The Subsystems section is used to define SCPI commands (organized into subsystems), searchable help section and SCPI commands and queries syntax used by EEZ Studio to assemble a valid SCPI command ready for execution.
Adding SCPI commands and queries from HTML help file
SCPI commands (and queries) that can be used with instrument can be added in two ways: from specially formatted HTML help files or manually.
The first and preferred method require more preparations (i.e. creating HTML files) but offers more structured SCPI subsystems and simplify keeping track of changes. SCPI subsystems section has Refresh with content from HTML help folder option (Fig. 18.) that will compare HTML files stored in SCPI documentation folder (see Settings) with SCPI subsystems that already exists in the project.
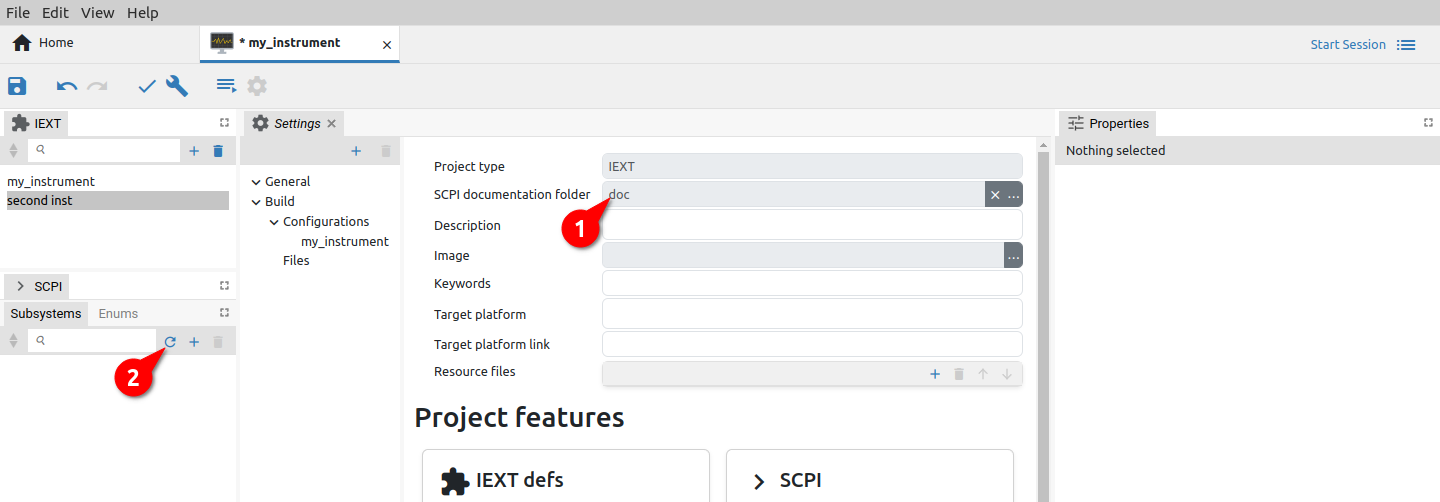
Fig. 10: Refresh SCPI commands from HTML help folder
This method presume that each HTML file include only one SCPI subsystems. Therefore one can create as many HTML files as instrument has SCPI subsystems. That give us freedom to add support for SCPI subsystems one by one or all at once.
For example, we can start with only one HTML file that has to be located in SCPI documentation folder (Fig. 11).
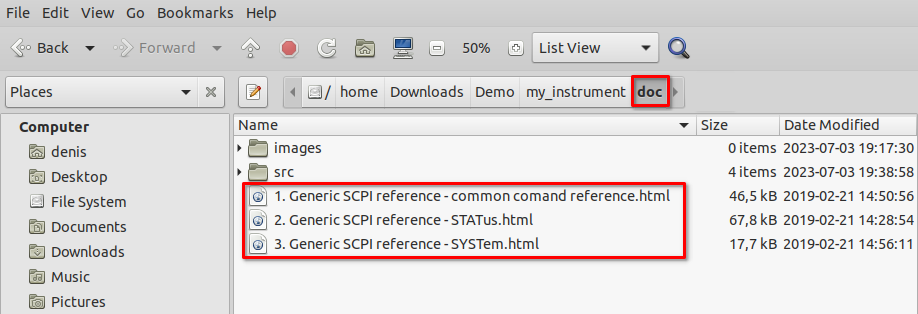
Fig. 11: SCPI help file example
The Refresh action in this example detected and reported 16 new SCPI commands as shown in Fig. 12. where we can decide what to do with reported commands: we can select one or more of them to include them into project or reject this action if reported commands and their number is not as we expected (i.e. not in accordance with created HTML files).
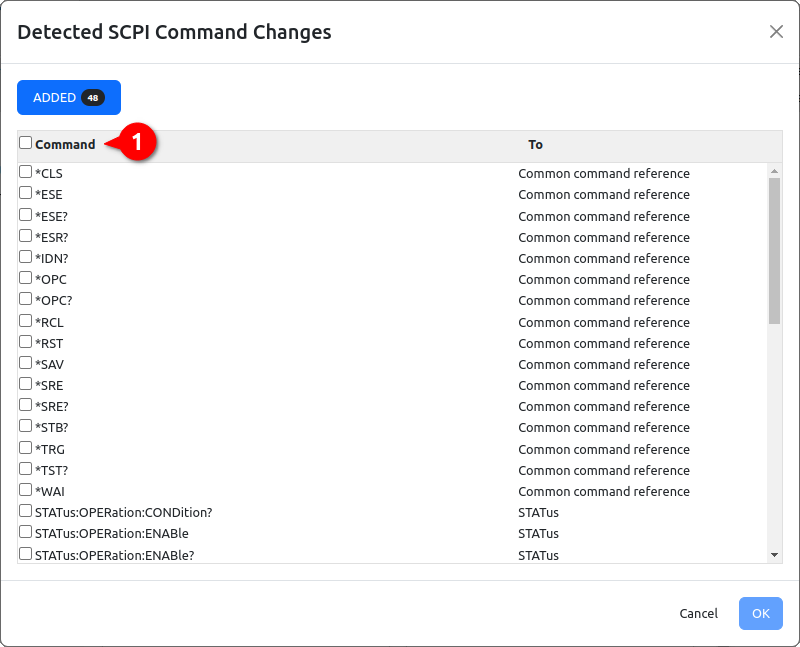
Fig. 12: Detected SCPI command changes
The result of adding newly detected SCPI commands and queries is shown in Fig. 13. The subsystem name as defined in HTML file is listed in Subsystems section and commands and queries in Commands section.
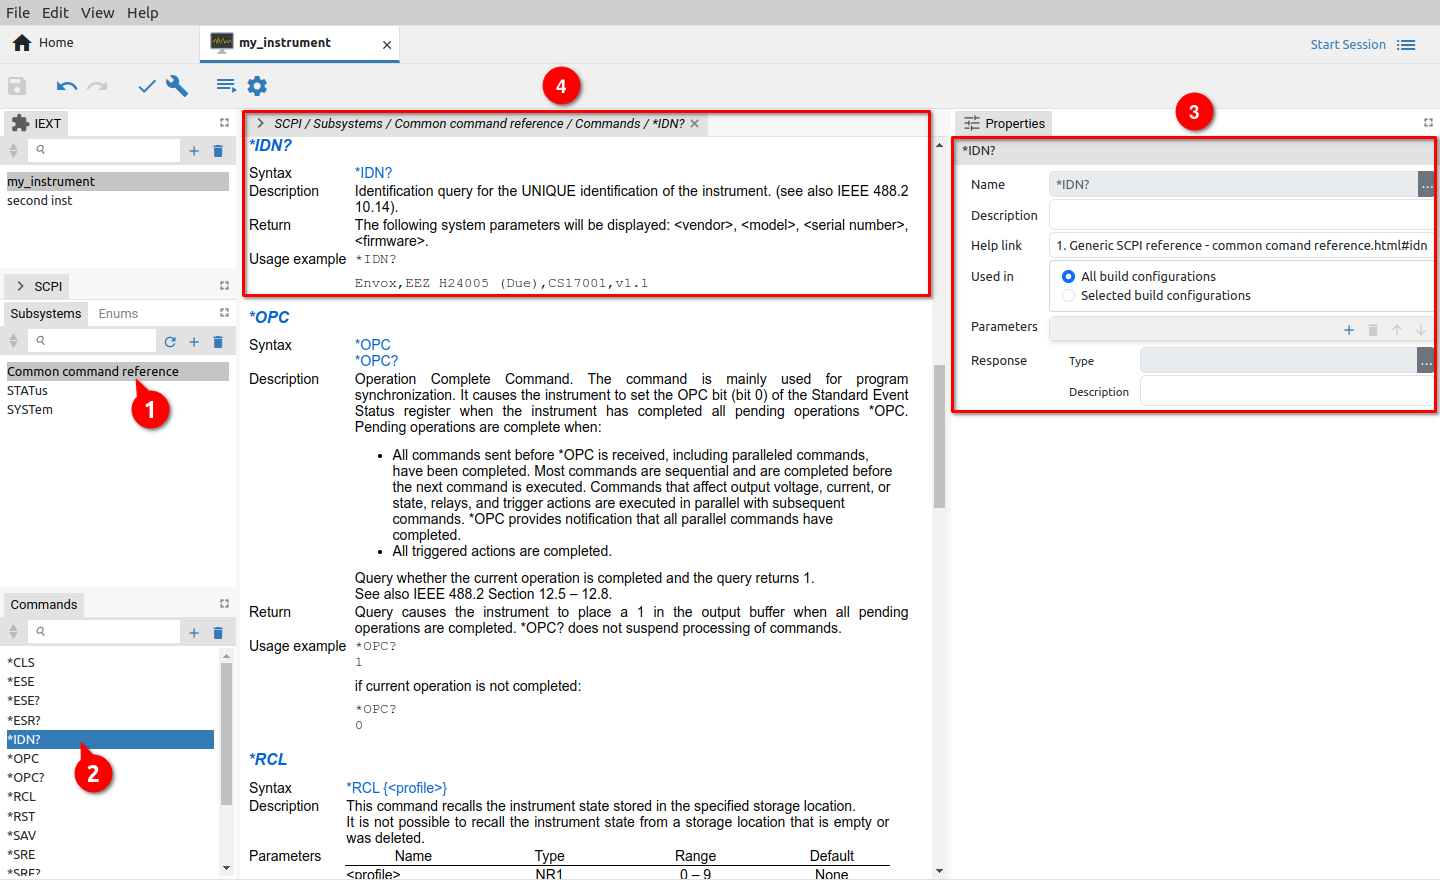
Fig. 13: Newly added SCPI commands
The selected SCPI command or query details are displayed on the right as follows:
|
Parameter |
Explanation |
|
Name |
SCPI command or query name (has to be defined in accordance with SCPI specification). |
|
Description |
SCPI command or query name description. |
|
Help link |
Hyperlink to description related to SCPI command or query that could be within HTML help file (added automatically and displayed down below) or somewhere else. |
|
Used in |
Define build configurations that will include this SCPI command or query. All build configurations option is selected by default. |
|
Parameters |
List of mandatory and optional SCPI command parameters |
|
Response |
Expected SCPI query response |
If HTML help file is structured properly as e.g. for the Generic SCPI instrument that is available on the GitHub repository, the EEZ Studio will also include command parameters into the project. Still, the SCPI query will require some attention, since its response type cannot be directly parsed. Therefore EEZ Studio will report some errors (seven in our case as shown in Fig. 13.).
Adding SCPI commands and queries manually
The second method for adding SCPI commands and queries is by adding it manually. A new SCPI subsystem can be created by choosing Add item option (+ sign) from Subsystems section as shown in Fig. 14.

Fig. 14: Create new SCPI subsystem
A new command can be added into selected subsystem using Add item option (+ sign) from Commands section (Fig. 15.).
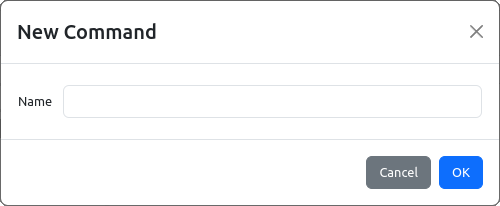
Fig. 15: Add new SCPI command or query
Properties of the newly added command is displayed on the right side and can be modified as shown on Fig. 16.
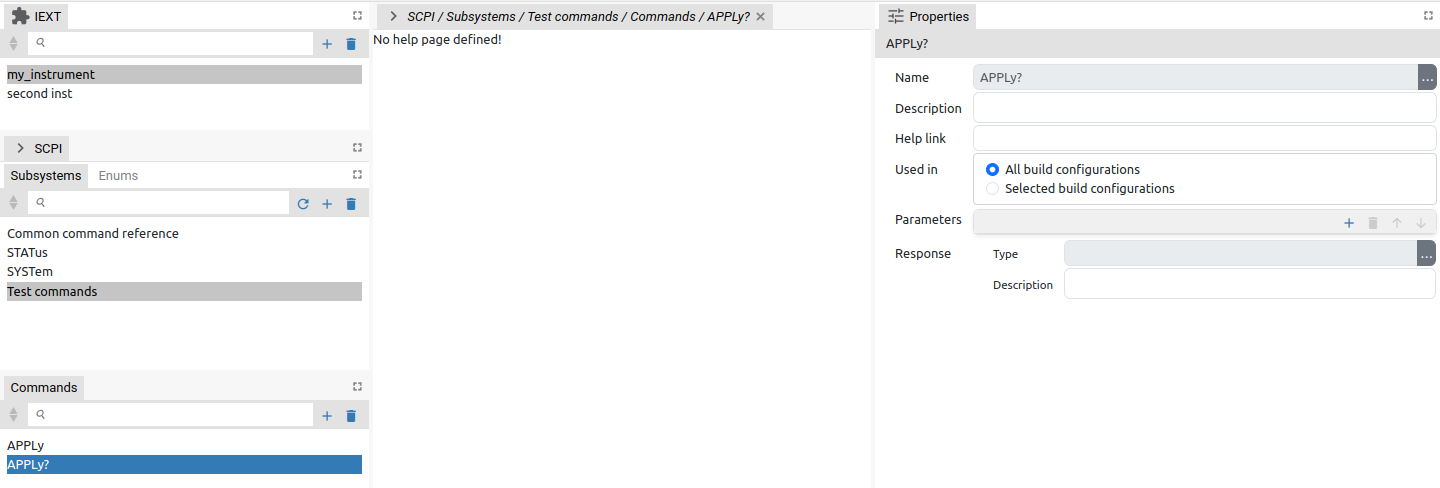
Fig. 16: Edit SCPI command properties
In our example command will require three parameters, that can be added sequentially one by one using the Add button. The third parameter is marked as optional (Fig. 17).
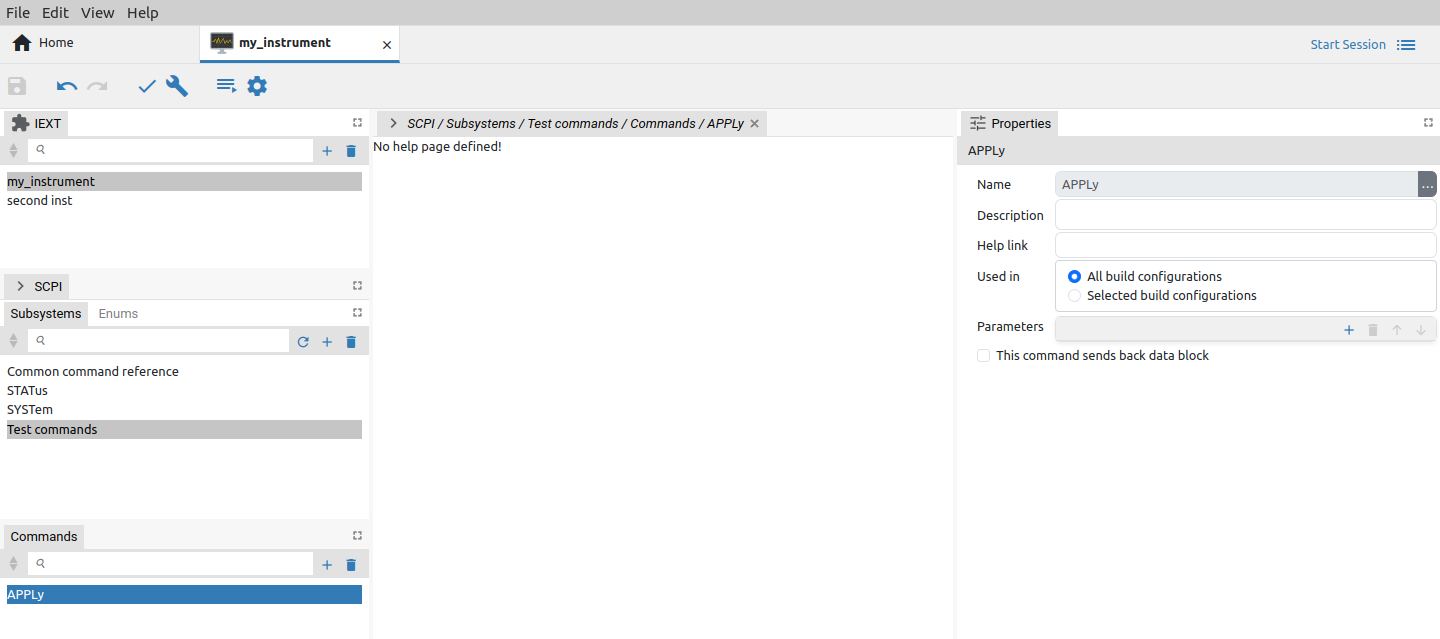
Fig. 17: Define SCPI command parameters
The question mark (?) at the end of the name make difference between SCPI query and command. Therefore if we’d like to add a SCPI query instead of command, the name has to end with question mark. For example, APPLy? is a query form of the APPLy command. When SCPI query is defined a new section will appear as shown on Fig. 18.
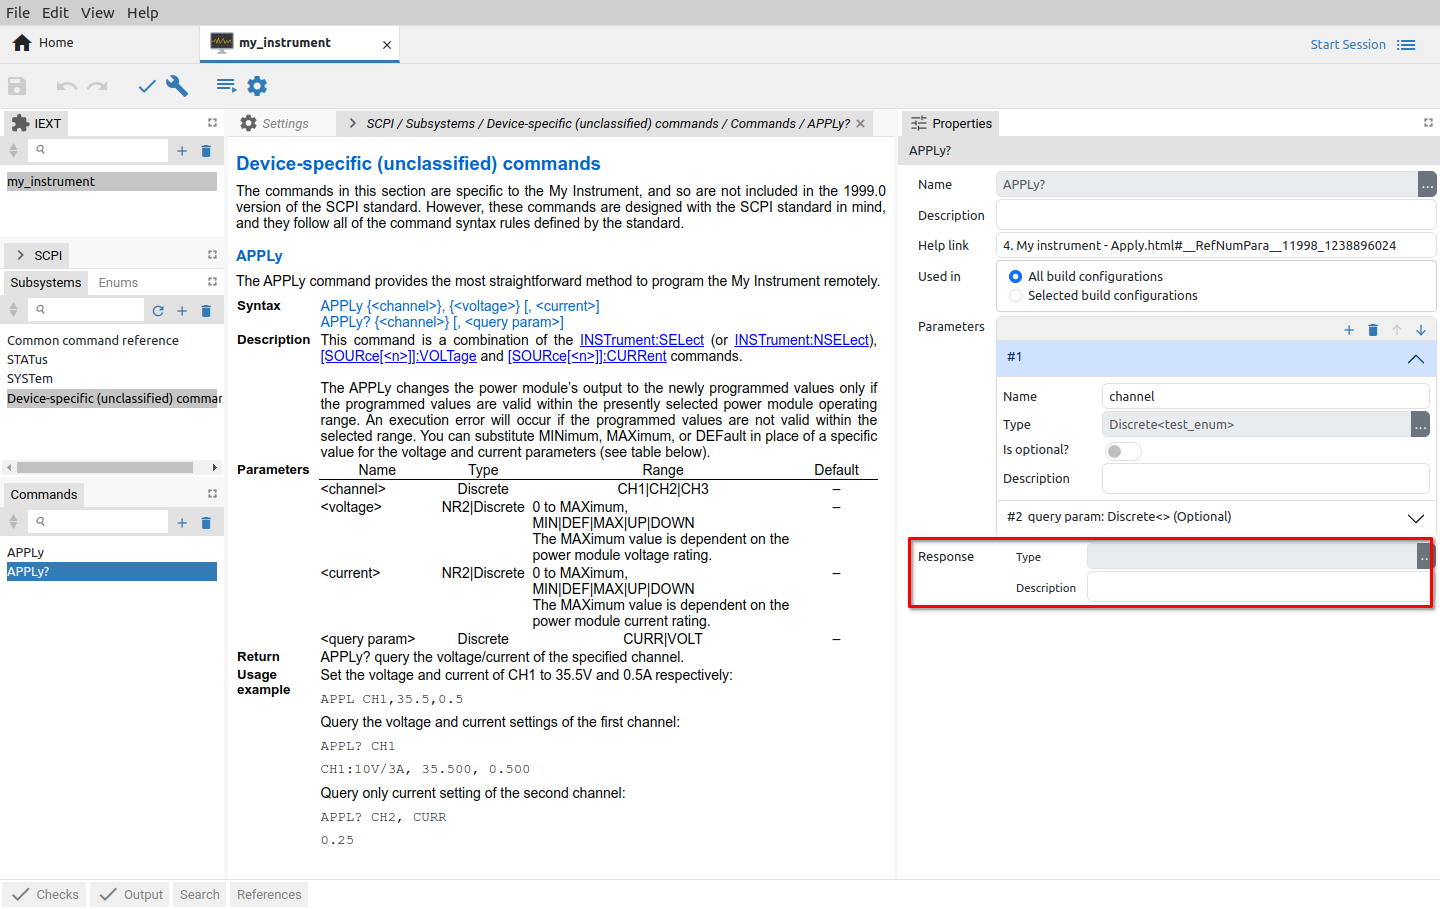
Fig. 18: SCPI query response properties
Finally, a word of caution when project contains SCPI commands and queries that were manually added. Every time when Refresh with content from HTML help folder option (Fig. 10., (2)) is selected it will report that “deleted” commands are found. Such commands does not exists in any of HTML help files, hence they are proclaimed as deleted (the EEZ Studio presume that they were once existed and imported into project but afterward removed from the latest HTML files version). In this case, commands listed under Deleted tab can be simply ignored (not checked).
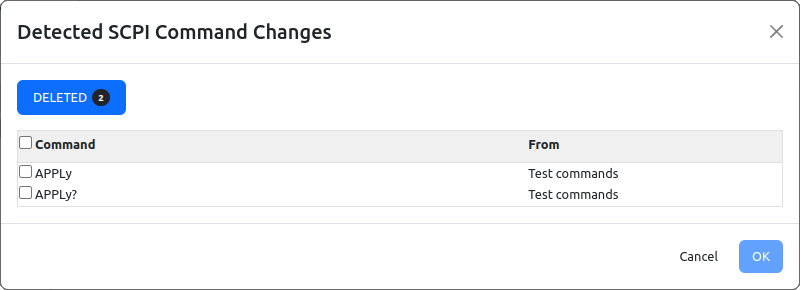
Fig. 19: Detected changes when manually added commands and queries exists
Parameters types and enumerations
The SCPI parameters could be of one or more types. The SCPI command parameter type can be specified using the selection shown on Fig. 20.
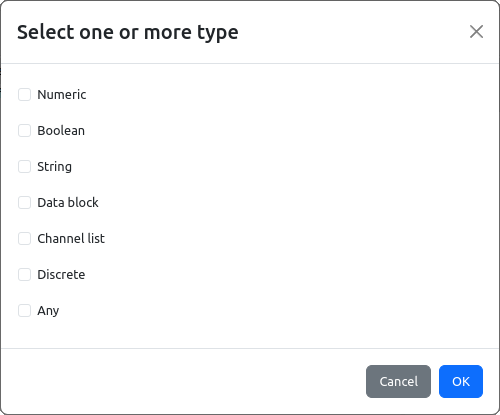
Fig. 20: SCPI command parameter types
|
Parameter |
Explanation |
|
Numeric |
Numeric values that can be Signed integer (NR1), Decimal, i.e. float with no exponent (NR2) or Real, i.e. float always with exponent (NR3). |
|
Boolean |
Logical “True” (1) or “false” (0). |
|
String |
One or more characters. |
|
Data block |
Block of data that is started with # symbol used to transfer huge amount of data, e.g. screenshot capture, measured data from the internal memory buffer, program or profile file upload/download, etc. |
|
Channel list |
List of one or more instrument “channels” that started with @ symbol, e.g. (@1,3) specify first and third instrument channels/modules . |
|
Discrete |
Enumerations of one or more values (see below). |
|
Any |
Denote usage of any of the above mentioned parameter types. |
Supported SCPI query parameter types (Fig. 21) are similar to command parameter types (Fig. 20) with few exceptions listed in the following table.
|
Parameter |
Explanation |
|
Arbitrary ascii |
Similar to String type but without quotation marks, e.g. as it is the case of response to *IDN? Query. |
|
List of quoted string |
List of two or more quoted strings separated by comma. |
|
Non standard data block |
Special case of Data block that doesn’t follow SCPI standard that specify usage of # symbol at the beginning (e.g. require to properly handle data block generated by some Siglent instruments). |
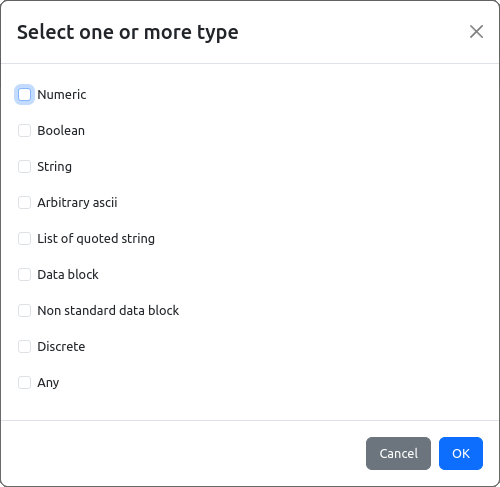
Fig. 21: Response types used with SCPI queries
Special attention require Discrete parameter types. Many SCPI commands and queries works with predefined values that can be used to address instrument resources (e.g. channels, modules), pre-installed functionalities or that which has to be additionally obtained and activated, etc. For example, discrete values can be channel names like CH1, CH2, CH3 or wave shapes like SINusoid, SQUare, RAMP, PULSe, NOISe, etc. and they don’t necessarily have numeric equivalents. Therefore we cannot use Numeric type, and from other side String type could offer too much freedom and in that case IEXT cannot provide “hints” i.e. list of values that instrument only can accept with accompanied command.
List of allowed (discrete) values can be defined using the enumerations (Fig. 22). Project can contain unlimited number of enumerations with possibility that one or more discrete values is repeated in two or more enumerations.
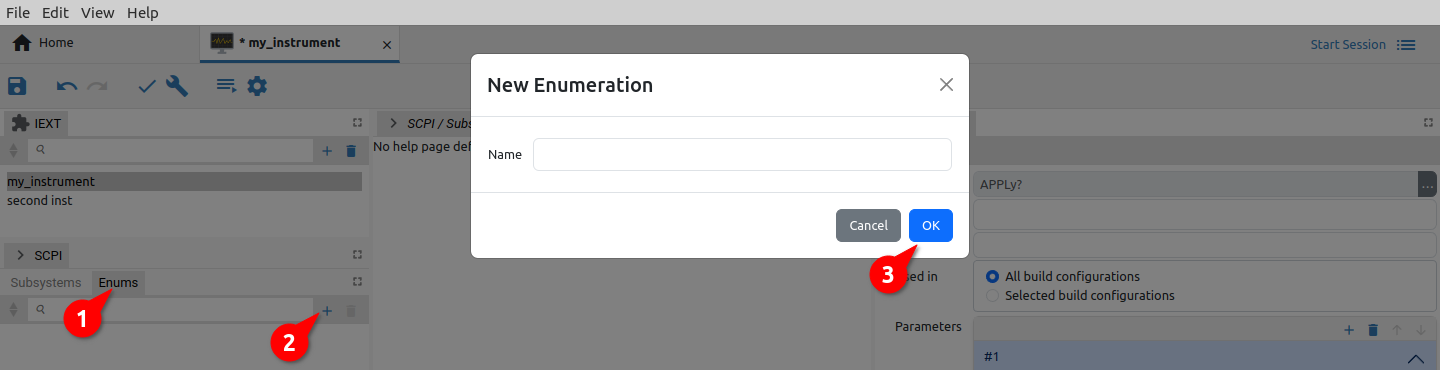
Fig. 22: Enumerations section for discrete parameter types
A new enumeration can be created by choosing the Add item option (+ sign) when enumeration can be specified (Fig. 22). Enumeration data (members) can be added using the Add button and entering the name as shown in Fig. 23. Please note that Member’s Value field is not used and can be left empty.
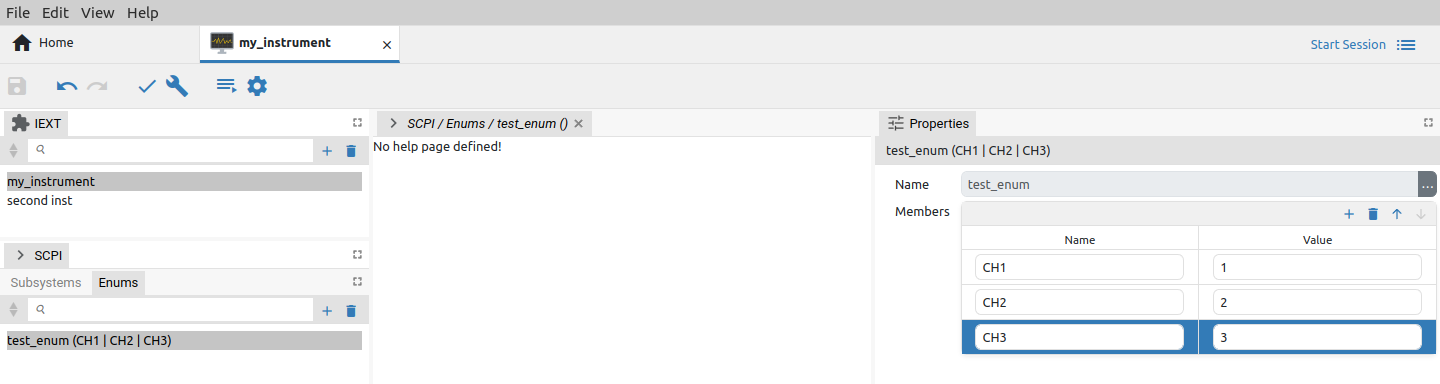
Fig. 23: Specify enumeration data
Once defined, the enumeration will become available in the list of Discrete types can be used with multiple SCPI commands and queried. For example, we can use it to specify allowed values for channel parameter of previously created APPLy? query or APPLy command (Fig. 24).
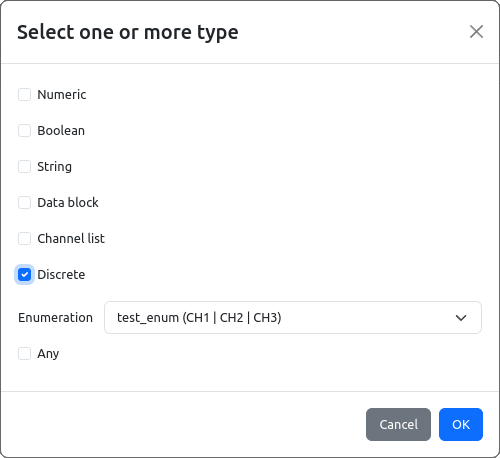
Fig. 24: Enumeration selection
When IEXT is successfully built and installed we can see how above mentioned channel parameter of Discrete type looks in SCPI command selection (Fig. 25). It will offer a list of discrete values that can be used to accurately select one of the existing channel.
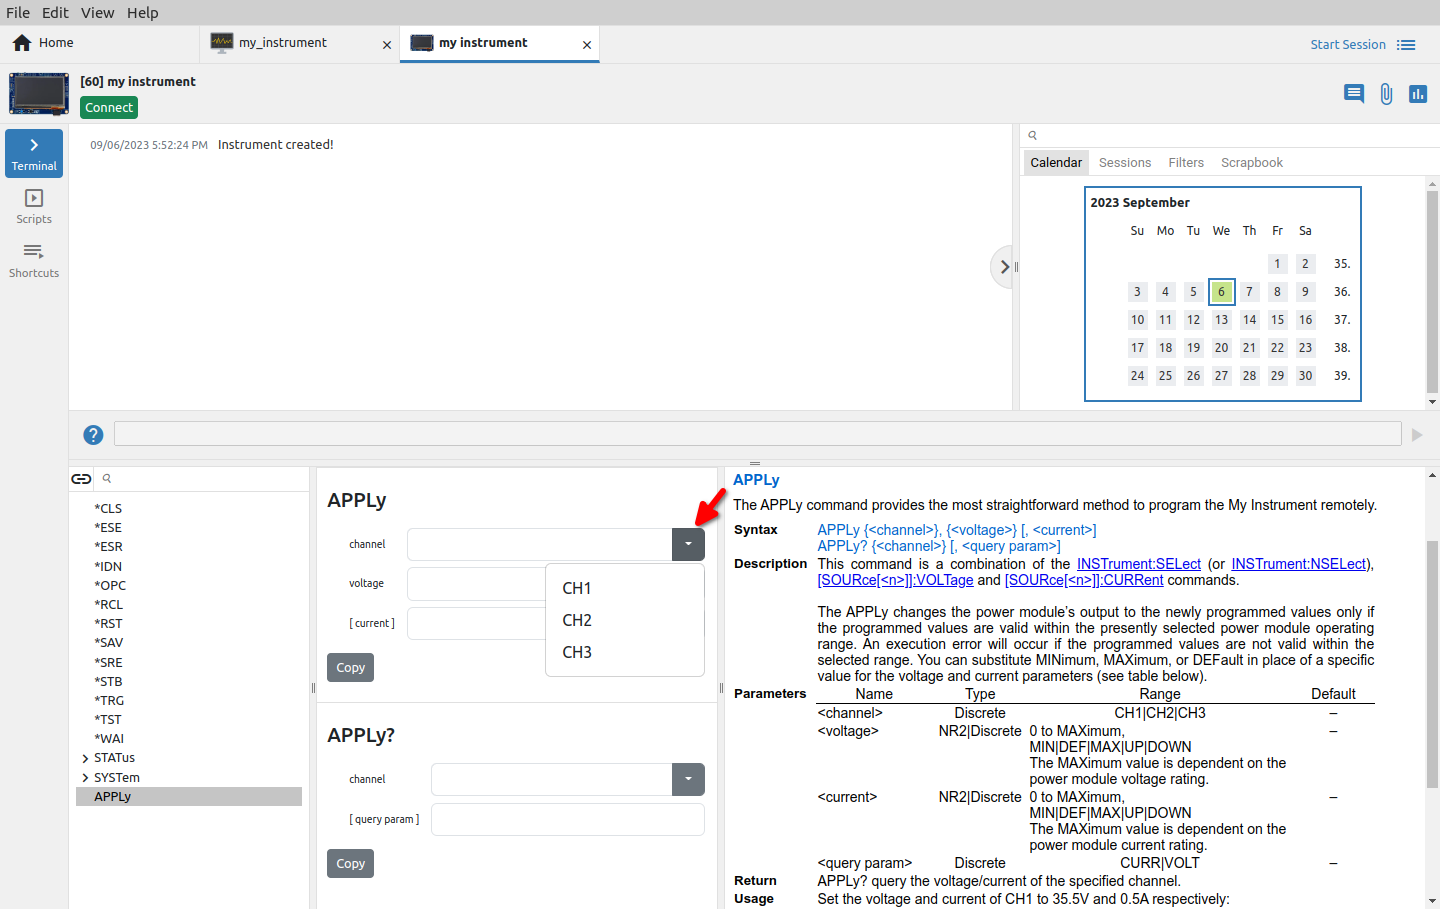
Fig. 25: Discrete type parameter selection displayed as part of selected command
The Instrument commands section is used to define commands, searchable help section and commands syntax used by EEZ Studio to assemble a valid instrument command ready for execution.
Instrument commands can be added in two ways: from specially formatted HTML help files or manually. The first and preferred method require more preparations (i.e. creating HTML files) but offers more structured help section and simplify keeping track of changes. The Instrument commands section has Refresh with content from commands help folder option (Fig. 26.) that will compare HTML files stored in Commands documentation folder (see Settings) with instrument commands that already exists in the project.
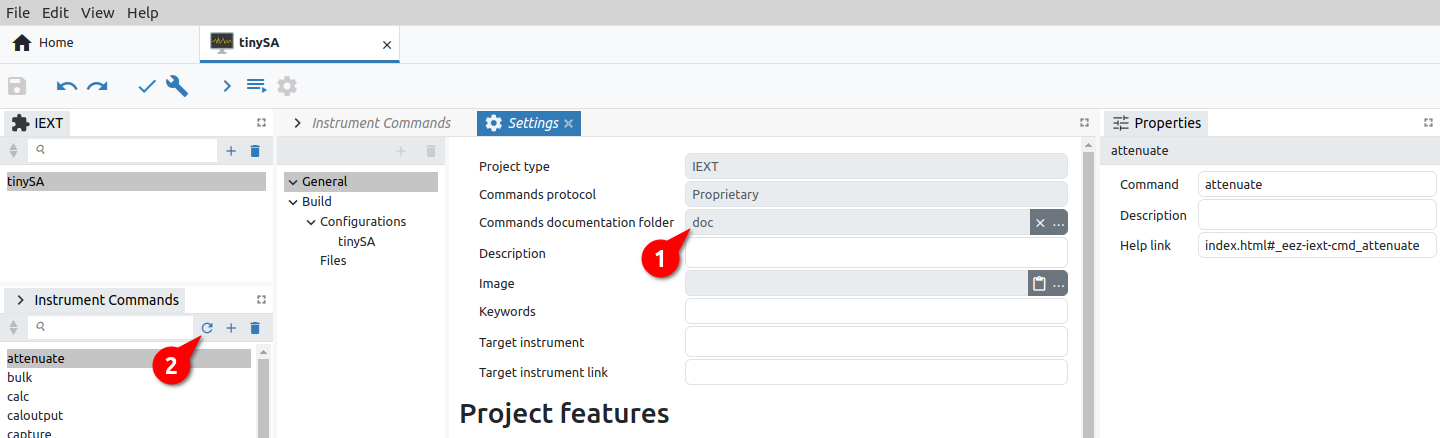
Fig. 26: Refresh instrument commands from HTML help folder
The HTML help file should have a defined name for each command. By command name, it will be possible to search in IEXT. For example, for the attenuate command, the HTML help file would need to define the name as follows: <a name="_eez-iext-cmd_attenuate">
Shortcuts can simplify execution of SCPI commands sequence or JavaScript code used in communication with an instrument. Shortcuts included into IEXT will become available by default to all instances of the installed instrument and they can be complemented with shortcuts that user defined for selected instrument instance. IEXT project shortcuts section is shown on Fig. 27.
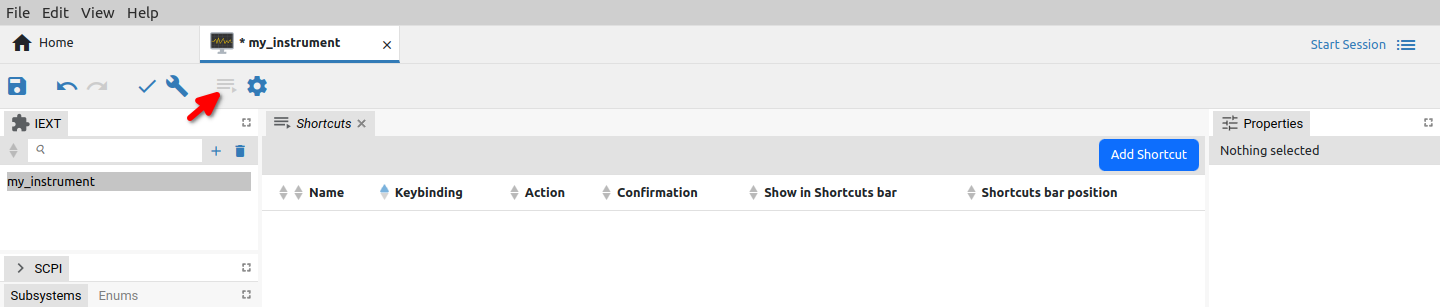
Fig. 27: Shortcut and scripts menu
The Add Shortcut option will open an entry form (Fig. 28.) with the following parameters (mandatory parameters are marked bold):
|
Parameter |
Explanation |
|
Name |
Shortcut name that will appear in the instrument’s shortcut toolbar |
|
Used in |
Define build configurations that will include this SCPI command or query. All build configurations option is selected by default. |
|
Keybinding |
Shortcut’s “hotkey” definition. Usually the function keys are used (F1 to F12) but other combinations with special keys (Ctrl, Alt, etc.) is also allowed. |
|
Action type |
Shortcut type: SCPI commands, JavaScript code or MicroPython code. |
|
Action code |
Contain SCPI commands sequence or JavaScript code depending of selected Action type. |
|
Requires confirmation |
When selected, an additional confirmation dialog box will be displayed when shortcut is selected from the instrument’s shortcut toolbar. |
|
Show in toolbar |
Enable displaying of shortcut button in the instruments shortcut’s toolbar |
|
Button position |
Shortcut button position within the toolbar. Applicable only if Show in toolbar option is checked. |
|
Button color |
Shortcut button color. Applicable only if Show in toolbar option is checked. |
An example of a shortcut that include JavaScript code is shown on Fig. 29. Note that its Action type parameter is set to JavaScript.
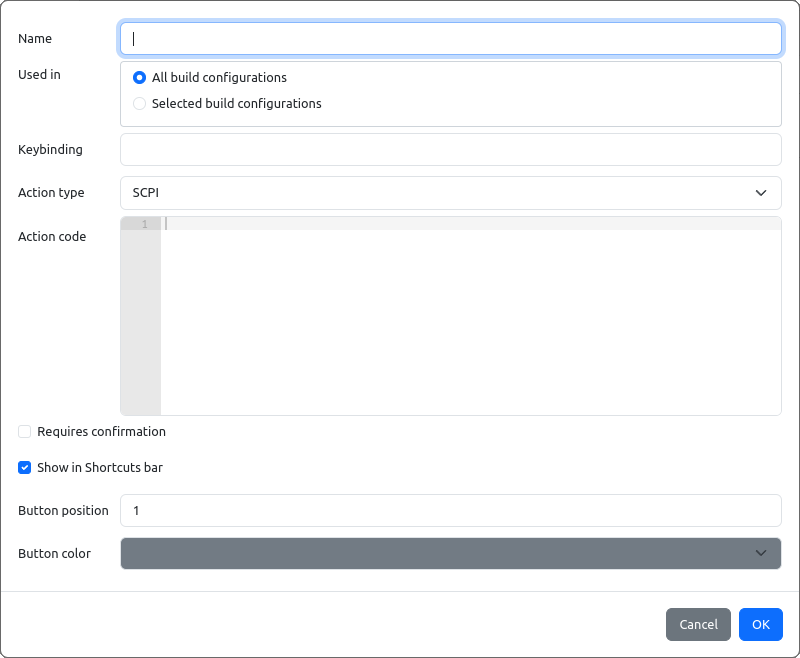
Fig. 28: Add new shortcut with SCPI commands sequence
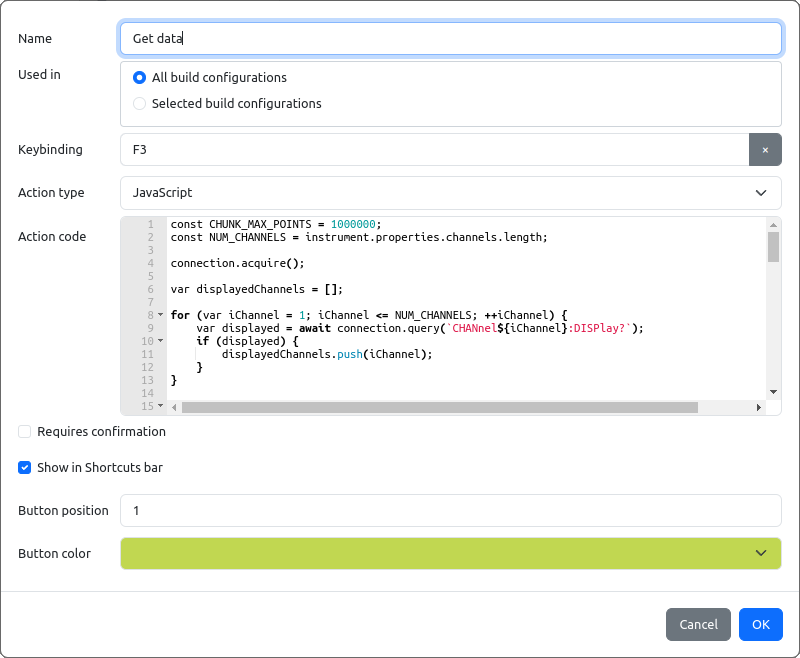
Fig. 29: Add new shortcut with JavaScript
Created shortcut examples will appear in the Shortcut section as shown on Fig. 30. and sorted by their Toolbar position parameter.
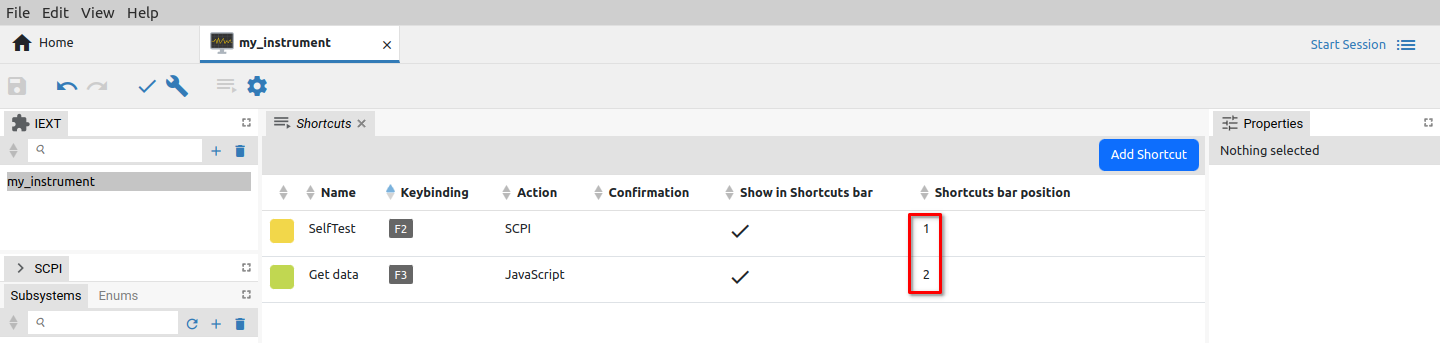
Fig. 30: Shortcut’s toolbar positions
Created IEXT’s shortcut will appear in the instrument’s Terminal and can be accessed by mouse click and F2 or F3 key respectively.
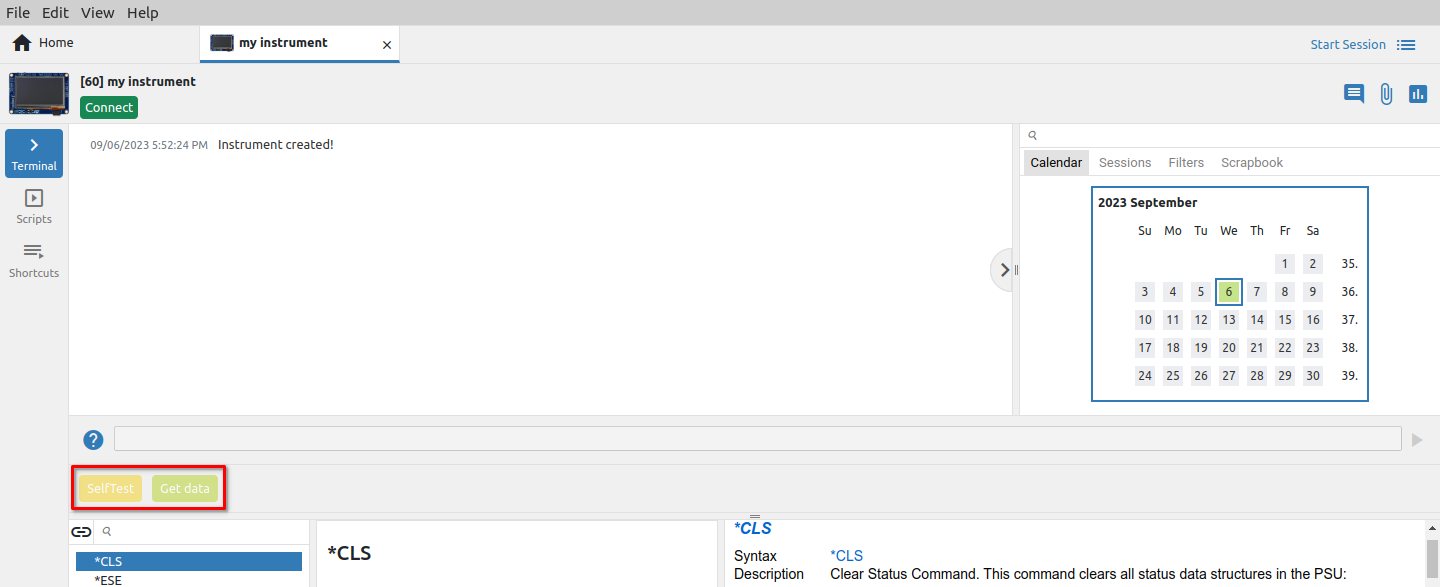
Fig. 31: Shortcuts in the instrument toolbar