P10. Bitmaps
In Fig. 1 shows the Bitmap panel (1) in which there is a list of bitmaps that can be used in the project. The project can contain an unlimited number of bitmaps, and for the selected bitmap (2) you can see the size in pixels (3) and image preview (4).
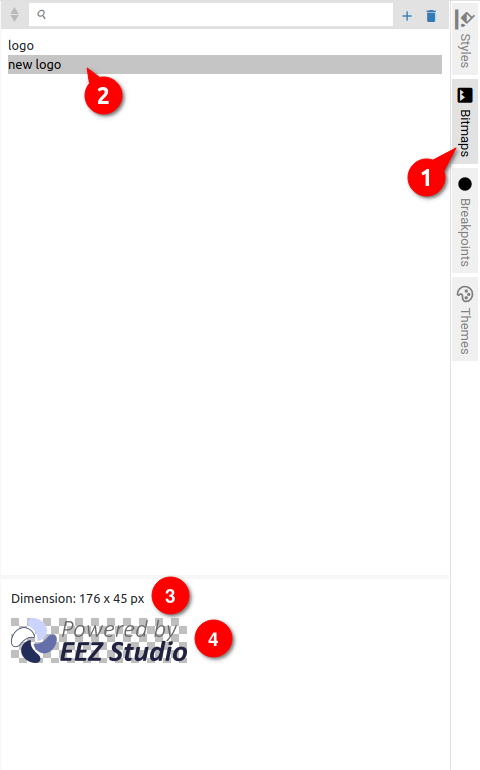
Fig. 1: Bitmap panel
P10.1. Adding a bitmap
When adding a bitmap, a new dialog opens with a different number of parameters depending on the type of project. Fig. 2 shows the dialog for EEZ-GUI, Fig. 3 shows the Dashboard and Fig. 4 shows the LVGL project.
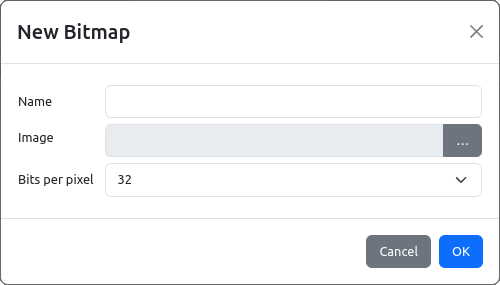
Fig. 2: Add new bitmap in EEZ-GUI project
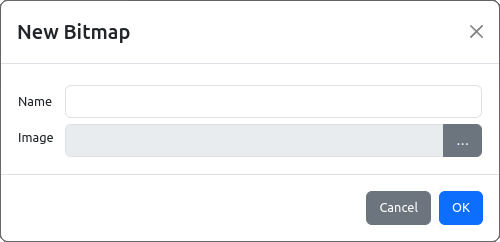
Fig. 3: Add new bitmap in Dashboard project
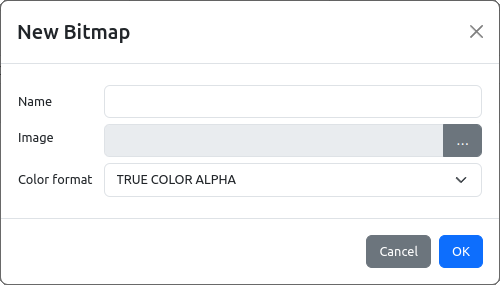
Fig. 4: Add new bitmap in LVGL project
|
Item |
Description |
|
Name |
Bitmap is referenced in other parts of project by its name. |
|
Image |
Selection of bitmap file from local storage. |
|
Bits per pixel (EEZ-GUI only) |
Color depth: 16 (RGB565) or 32 (RGBA, i.e. 24-bit color + Alpha channel). |
|
Color format (LVGL only) |
Described in https://docs.lvgl.io/8.3/overview/image.html#color-formats |
P10.2. Bitmap properties
Fig. 5 shows the properties for the bitmap from the Bitmap Panel for the EEZ-GUI project. The parameters are described in the following table.
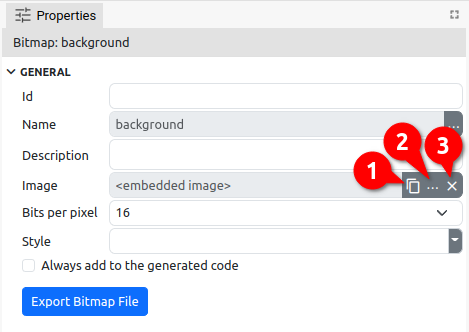
Fig. 5: Bitmap properties (EEZ-GUI)
|
Item |
Description |
|
|
Id (EEZ-GUI only) |
Bitmap is one of resources that is referenced by name in the project editor. When that project is built, names are no longer used, but numerical ID. This field is optional, i.e. an ID does not have to be specified, in which case an ID will be assigned during the build. However, if we want an object to always get the same ID, then it needs to be defined. Why would we want to always have the same ID? This is necessary when there is a master project such as modular-psu-firmware.eez-project from EEZ BB3 and that master project is used by BB3 Applets and BB3 MicroPython scripts and they can use resources from the master project that have that ID defined.
Important: once the ID is set, it should not be changed, otherwise all BB3 scripts that depend on it should be rebuilt. |
|
|
Name |
Bitmap is referenced in other parts of project by its name. Use the … button to change the existing name. |
|
|
Description |
Optional field, contains a description of the bitmap. |
|
|
Image |
This is the image file itself that is saved within the project file (embedded within project file). Options for Copy to clipboard (1), Paste from clipboard (2) and loading from local storage (3) are also available. |
|
|
Bits per pixel (EEZ-GUI only) |
16 – RGB565 32 – RGBA |
|
|
Style (EEZ-GUI only) |
The option is only enabled if Bits per pixel is set to 16. Only the background color from the entire style is used. If there is a transparent pixel in the default bitmap, then the background color will be displayed. |
|
|
Always add to the generated code (EEZ-GUI only) |
During the project build, i.e. when the source code is generated, only those Bitmaps that are used in the project will be inserted into the source code. However, if a bitmap is used within the native code but not in the EEZ Studio project, then using this option you can force the bitmap to be added to the source code even though it is not used in the project. |
|
|
Color format (LVGL only) |
Described in https://docs.lvgl.io/8.3/overview/image.html#color-formats Below are the LVGL constant names and their counterparts used in EEZ Studio. |
|
|
|
LVGL constant name |
EEZ Studio value |
|
|
LV_IMG_CF_ALPHA_1_BIT |
ALPHA 1 BIT |
|
|
LV_IMG_CF_ALPHA_2_BIT |
ALPHA 2 BIT |
|
|
LV_IMG_CF_ALPHA_4_BIT |
ALPHA 4 BIT |
|
|
LV_IMG_CF_ALPHA_8_BIT |
ALPHA 8 BIT |
|
|
LV_IMG_CF_INDEXED_1_BIT |
INDEXED 1 BIT |
|
|
LV_IMG_CF_INDEXED_2_BIT |
INDEXED 2 BIT |
|
|
LV_IMG_CF_INDEXED_4_BIT |
INDEXED 4 BIT |
|
|
LV_IMG_CF_INDEXED_8_BIT |
INDEXED 8 BIT |
|
|
LV_IMG_CF_RAW |
RAW |
|
|
LV_IMG_CF_RAW_CHROMA |
RAW CHROMA |
|
|
LV_IMG_CF_RAW_ALPHA |
RAW ALPHA |
|
|
LV_IMG_CF_TRUE_COLOR |
TRUE COLOR |
|
|
LV_IMG_CF_TRUE_COLOR_ALPHA |
TRUE COLOR ALPHA |
|
|
LV_IMG_CF_TRUE_COLOR_CHROMA_KEYED |
TRUE COLOR CHROMA |
|
|
LV_IMG_CF_RGB565A8 |
RGB565A8 |
|
Export bitmap file |
Use to export embedded image. |
|
P10.3. Using a bitmap
Bitmap can be used in Bitmap widget (EEZ-GUI and Dashboard project), i.e. Image widget (LVGL project). It can also be used in Style.
Below is an example of using a bitmap in the Bitmap widget in the Dashboard project. Fig. 6 shows the added Bitmap widget (1) to the page. In the Specific section, we select which bitmap from the list of bitmaps we want to use (2), which in our example is the bitmap called background (3).
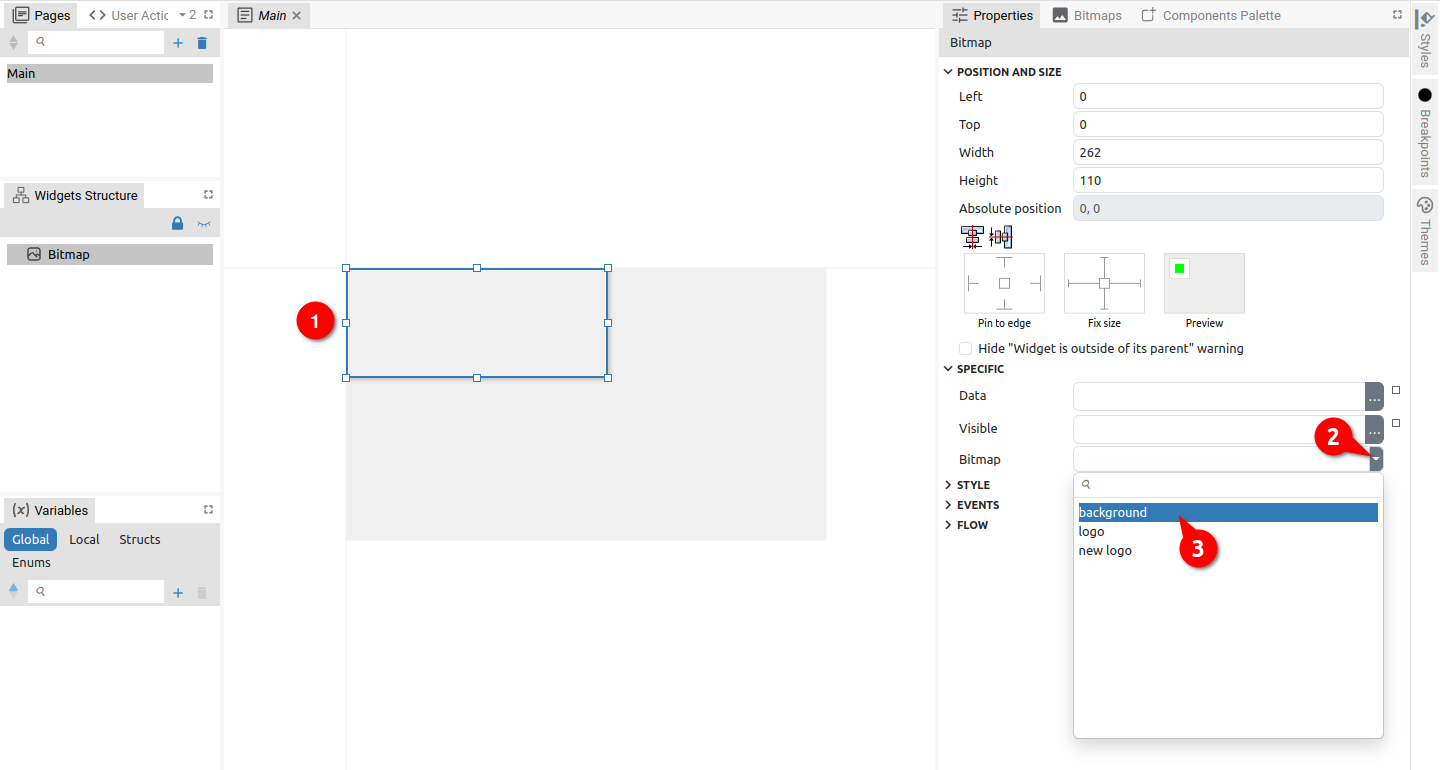
Fig. 6: Adding a bitmap to a Widget
Since the Widget’s dimensions are smaller than the selected bitmap, the bitmap will exceed the Widget’s borders as shown in Fig. 7. Here we can use the option Resize to Fit Bitmap (4) when the dimensions of the Widget will be adjusted to the size of the bitmap (Fig. 8).
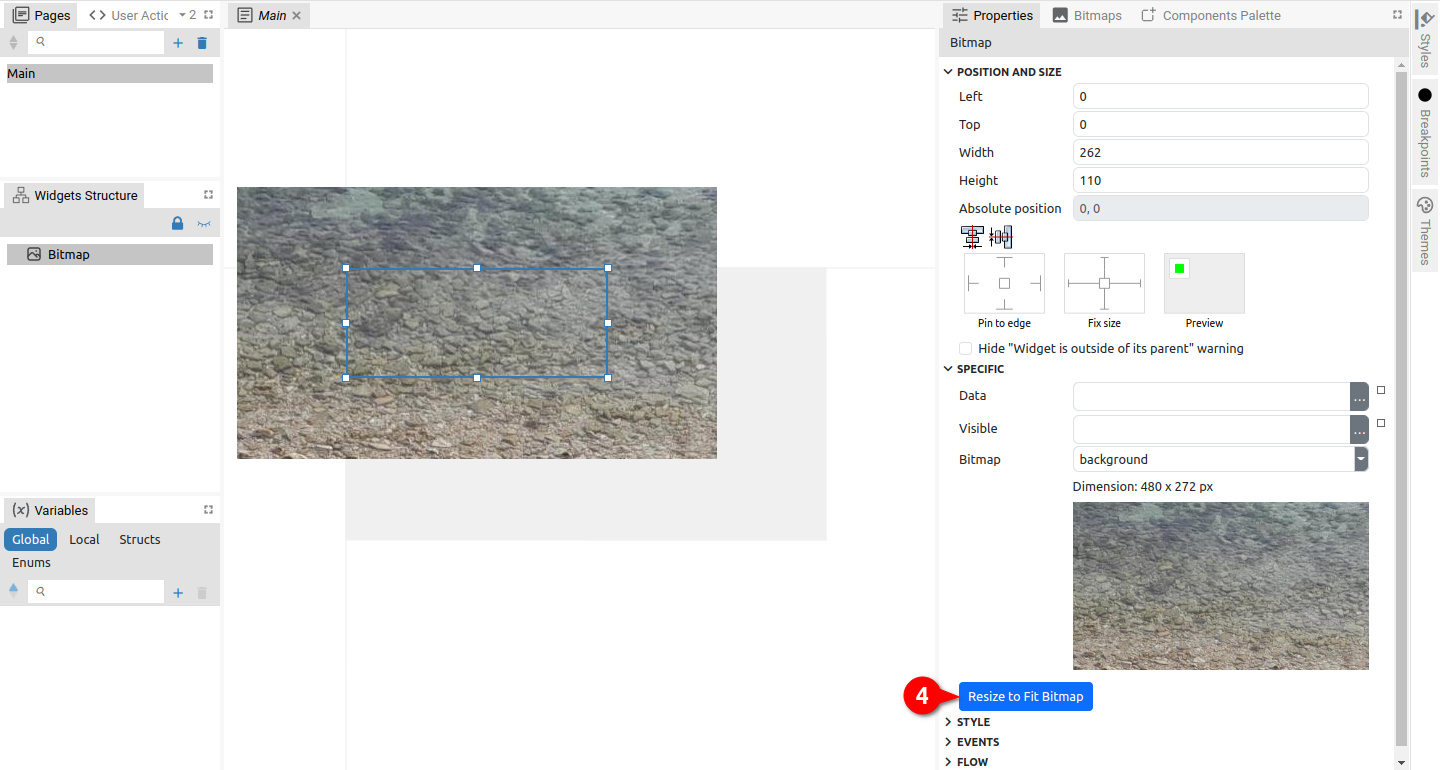
Fig. 7: Resizing the widget to fit the bitmap
Please note that this option is visible only if the current dimensions of the Widget do not match the dimensions of the bitmap (Fig. 8).
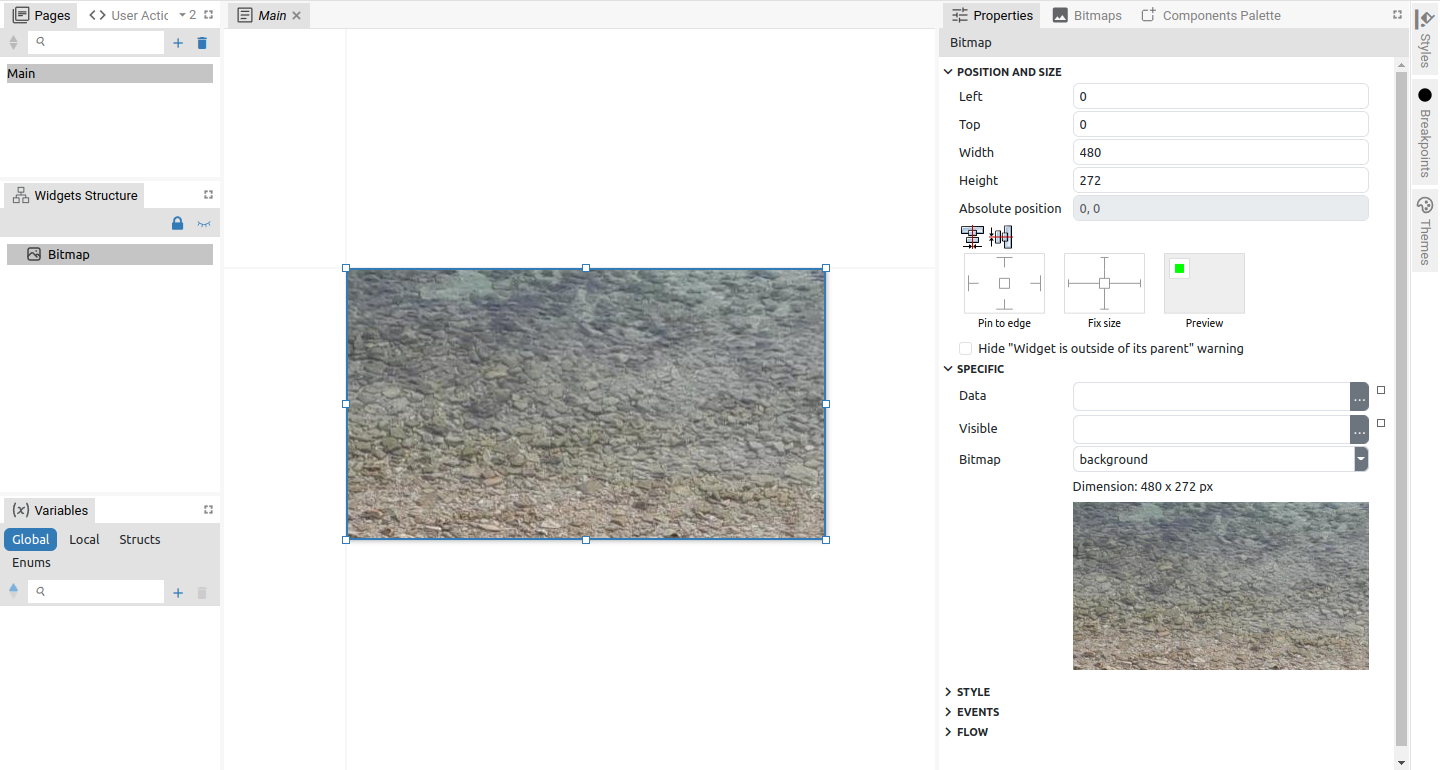
Fig. 8: Widget resized to bitmap size