P11. Fonts
The EEZ Studio project supports working with fonts. To work with fonts, it will be necessary in the project Settings (Fig. 1) under the General section (1) to enable the Fonts option in the project Settings (2).
The Font used consists of one or more characters taken from a TTF or OTF file and converted to antialiased bitmaps.
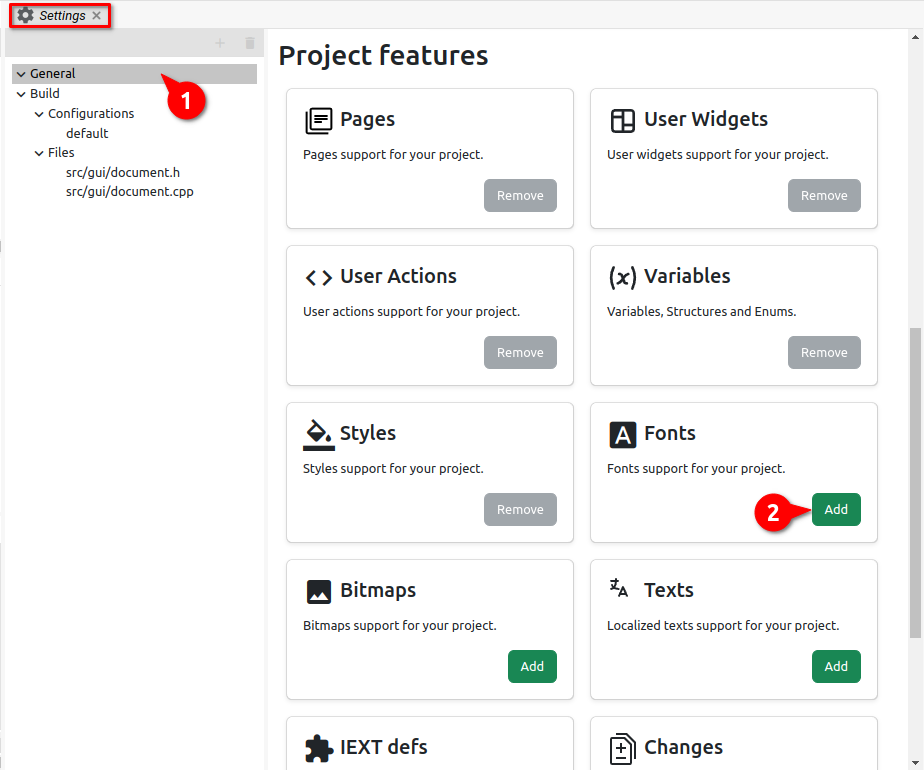
Fig. 1: Enable Fonts in project Settings
Fonts are defined only for EEZ-GUI and LVGL projects, and Dashboard projects do not use fonts. In the Dashboard project, vector fonts are used and the font is selected according to the name (Font Family attribute in Style).
In the EEZ-GUI project we have more options for editing fonts than in the LVGL project. Therefore, we will describe the work with fonts in those two types of projects in separate subsections.
P11.1. EEZ-GUI project fonts
P11.1.1. Add new font
To add a new font, it is necessary to select the Add item option in the Fonts panel, when the dialog shown in Fig. 2.
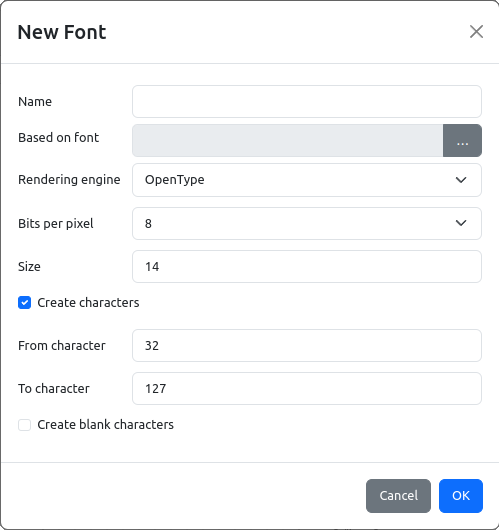
Fig. 2: Adding a new font to the EEZ-GUI project
|
Item |
Description |
|
Name |
The name of the font to be used in the project. |
|
Font file |
Selection of font file from local storage. |
|
Rendering engine |
The rendering engine, which can be FreeType (https://freetype.org/) or OpenType (https://opentype.js.org/), converts from vector to bitmap format. |
|
Font site (points) |
Size is in points (pt). Use this formula to convert points to pixels: 1 pt = 1.333 px. |
|
Create characters |
If unchecked, not a single character will be created when adding a font, i.e. characters can be added later. If it is checked, then the range of characters to be created will need to be selected, and then Create blank characters can be used if we want all characters to be empty. These options are rarely used, and can be used to create icon fonts. |
|
From character |
Decimal number of the initial character we want to create (e.g. 32 = 0x20 = blank space). |
|
To character |
Decimal number of the final character we want to create. |
|
Create blank characters |
If it is enabled, all added characters will be empty. |
After the font has been successfully added and the desired characters have been created, it is possible to view them in the table as shown in Fig. 3 For the selected character, its enlarged preview will be displayed on the right.

Fig. 3: Font character table (EEZ-GUI project)
P11.1.2. Add character
Once we have added the font to the project, it is possible to add new characters or delete existing ones. For this, we use the options shown in Fig. 4.
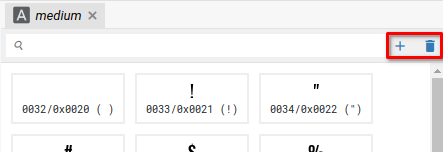
Fig. 4: Add/delete font character
When adding a new character, a dialog opens as shown in Fig. 5.
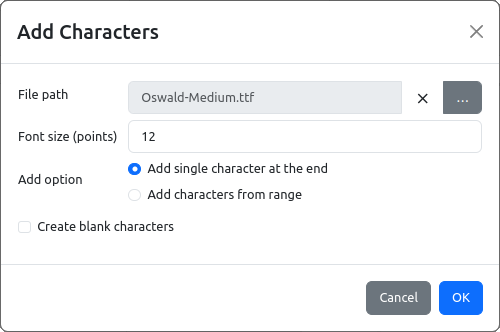
Fig. 5: Add new font character
|
Item |
Description |
|
|
File path |
File path to the font file on local storage. An existing one can be deleted or a new one can be added. |
|
|
Font size (points) |
Size is in points (pt). Use this formula to convert points to pixels: 1 pt = 1.333 px. |
|
|
Add option |
|
|
|
|
Add single character at the end |
Adding only one character to the end of the table. |
|
|
Add characters from range |
Adding two or more characters from a defined range. |
|
|
Add missing characters |
The option is available only if multi-language is used (Texts panel, see Chapter XX) and there is a character in one of the strings that is not present in the font. |
|
Create blank characters |
If it is enabled, all added characters will be empty. |
|
P11.2. LVGL project fonts
P11.2.1. Add new font
To work with fonts in the LVGL project, the library https://github.com/lvgl/lv_font_conv is used. To add a new font, it is necessary to select the Add item option in the Fonts panel, when the dialog shown in Fig. 2.
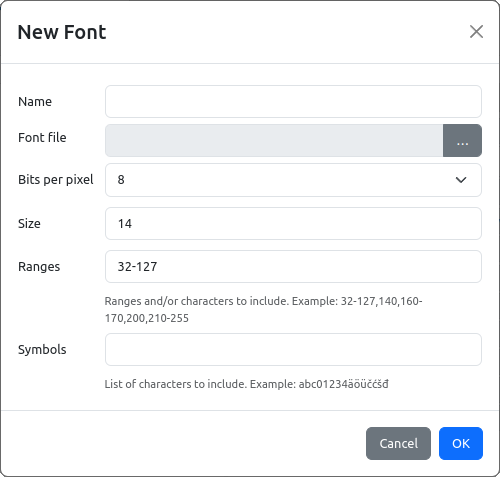
Fig. 6: Adding a new font to the LVGL project
|
Item |
Description |
|
Name |
The name of the font to be used in the project. |
|
Font file |
Selection of font file from local storage. |
|
Bits per pixel |
1, 2, 4, or 8-bits. Defines the number of shades to be used for anti-aliasing. The higher the number, the softer the characters will look, but the font will also use more storage memory. |
|
Font size (pixels) |
Size in pixels (px). |
|
Ranges |
??? |
|
Symbols |
??? |
In Fig. 7 shows the properties of the selected font, and Fig. 9 properties of the selected character from the font table. All properties are informative in nature, i.e. cannot be changed, except that the Description for the Font can be edited.
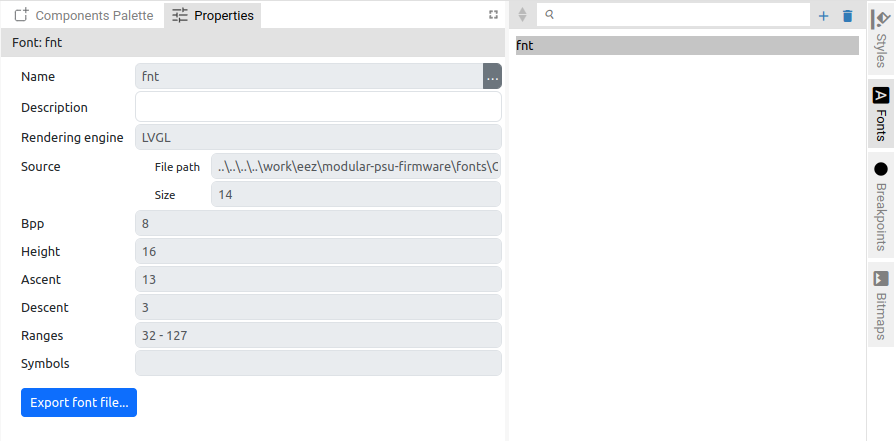
Fig. 7: Font properties
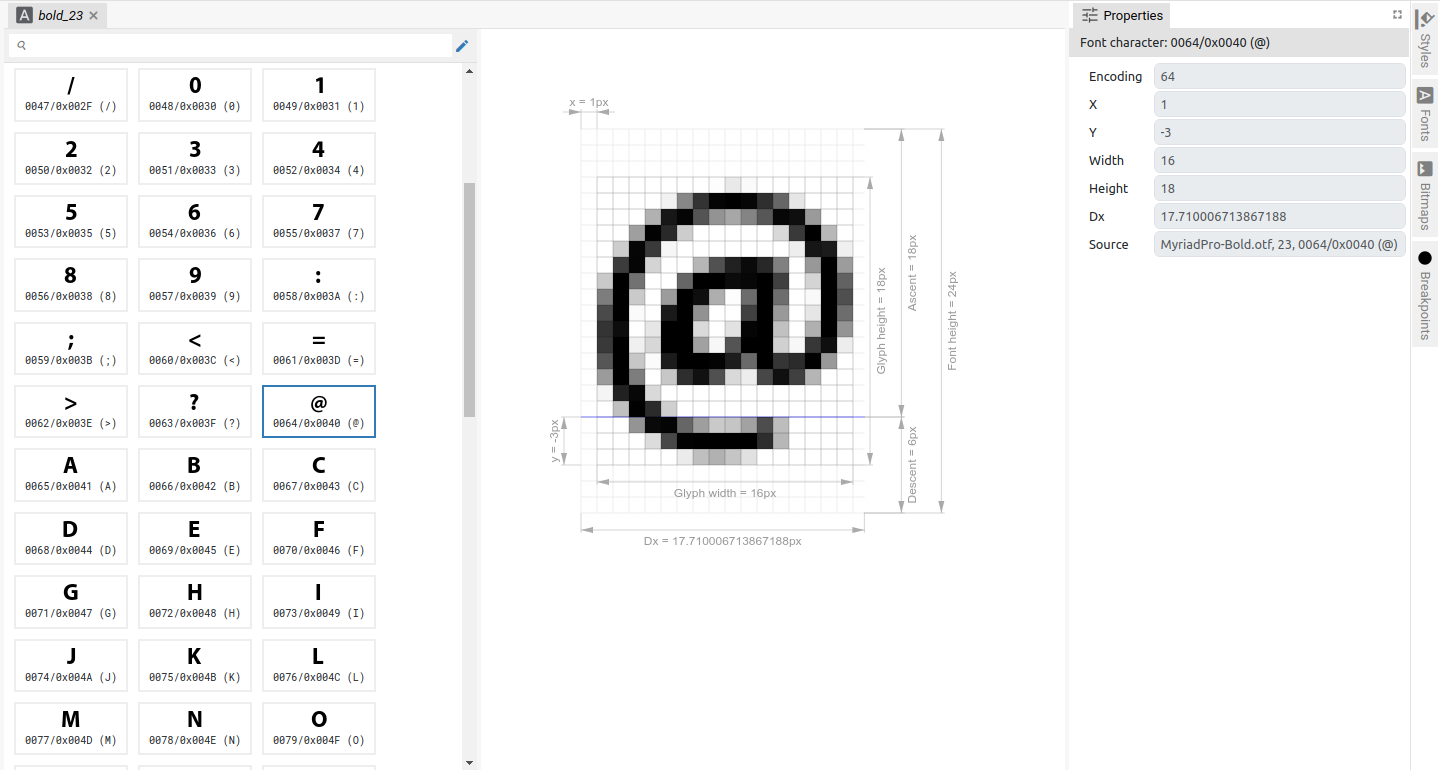
Fig. 8: Font character table (LVGL project)
P11.2.2. Edit characters
Once the font is created, the only thing we can do with the font in terms of editing is to add or delete characters. For this, it is necessary to select the Add or Remove Characters option shown in Fig. 9.
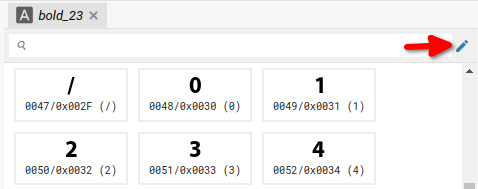
Fig. 9: Add or Remove characters option (LVGL project)
The dialog shown in Fig. 10 through which it is possible to define the Ranges and/or Symbols of the character we want to have in the font table.
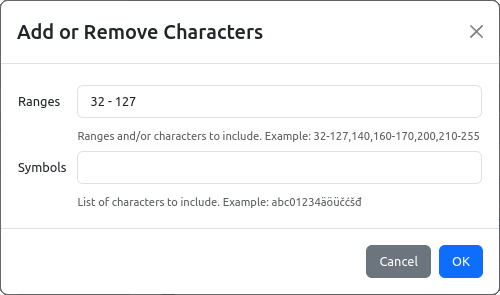
Fig. 10: Font characters editing (LVGL project)