17. Node-RED integration
Work in progress

Node-RED is a free and open source flow based programming tool for event-driven applications that provides a browser-based editor that makes it easy to wire together program flows using the wide range of predefined nodes that perform a specific action.
The integration of EEZ BB3 with Node-RED allows the creation of complex automation tasks quickly and without the need for common procedural programming. This makes this solution suitable for use in ATE environments for benchtop development, lab testing automation or manufacturing floor quality assurance.
An additional advantage of this combination is that it is end-to-end open source and cross-platform which facilitates deployment in different environments and facilitates the sharing of test procedures.
Node-RED also includes support for Git which further simplifies team development and sharing.
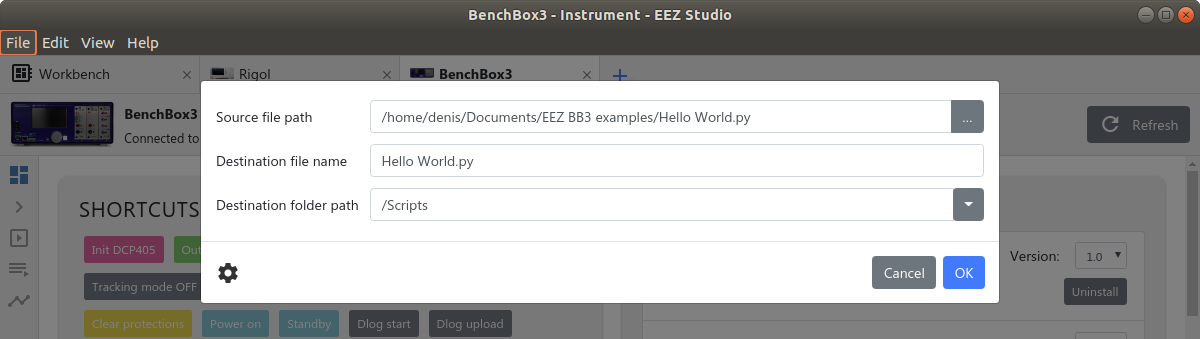
This chapter will describe how to install Node-RED and a simple flow example to automate relay contact testing. The flow used is available at https://github.com/eez-open/node-red-relay-loop-test
17.1. Node-RED installation
Unlike the MicroPython integration described in the Scripting with MicroPython chapter where the MicroPython script is executed autonomously on EEZ BB3, in the case of Node-RED you will need to have a computer on which to execute it. To communicate with EEZ BB3 it will be necessary to establish a connection via the Ethernet interface. For this reason, it will be necessary to install Node-RED first.
Details of the installation can be found on the official Node-RED website at the following link https://nodered.org/docs/getting-started/local
In short, the installation can be summarized in the following few steps:
|
1 |
Node-RED requires a supported version of NodeJS. Download and install NodeJS for your operating system available at https://nodejs.org/en/download/
|
|
2 |
Open a terminal application (in Windows this is called the Command prompt) and start the Node-RED installation with the following command: npm install -g –unsafe-perm node-red Linux users requires root privileges, therefore the command has to include sudo: sudo npm install -g –unsafe-perm node-red The same command can be used later to upgrade Node-RED to the latest version.
Linux users: if npm is not installed yet use command such as: sudo apt install npm |
|
3 |
The same procedure is needed to install the Node-RED dashboard. Windows user need to enter the following command: npm install node-red-dashboard On Linux system enter: sudo npm install node-red-dashboard |
|
4 |
Run the following command to ensure Node.js and npm are installed correctly: node –version && npm –version In response, you will receive versions number similar to: v12.19.0 6.14.8 |
17.2. Node-RED running
Node-RED is also started from the terminal (command prompt). To start enter:
node-red
Note that the terminal in which you started Node-RED must be active at all times for normal operation. If you want to exit, first press Ctrl + C and wait for the prompt to appear. You can then close the terminal application or run Node-RED again.
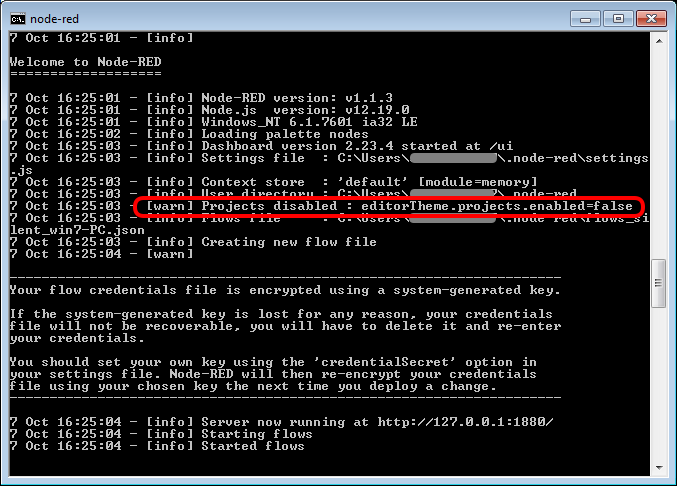
Welcome text similar to the one shown below will appear on Linux:
Node-RED will also display the log of its activities in the terminal. The log output at the beginning provides information such as:
- The versions of Node-RED and Node.js
- Any errors hit when it tried to load the palette nodes
- The location of Settings file and User Directory
- The name of the flows file it is using, etc.
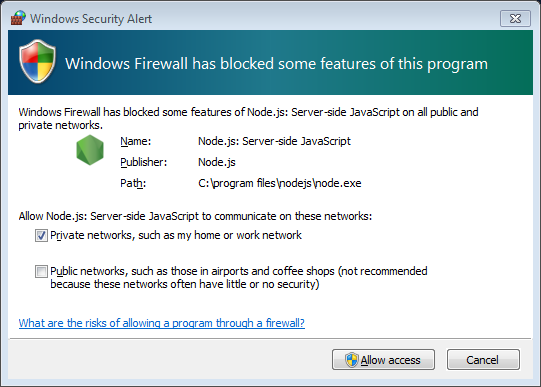
The first time you run node-RED on Windows, a firewall warning will appear. Confirm default settings by selecting the Allow access option.
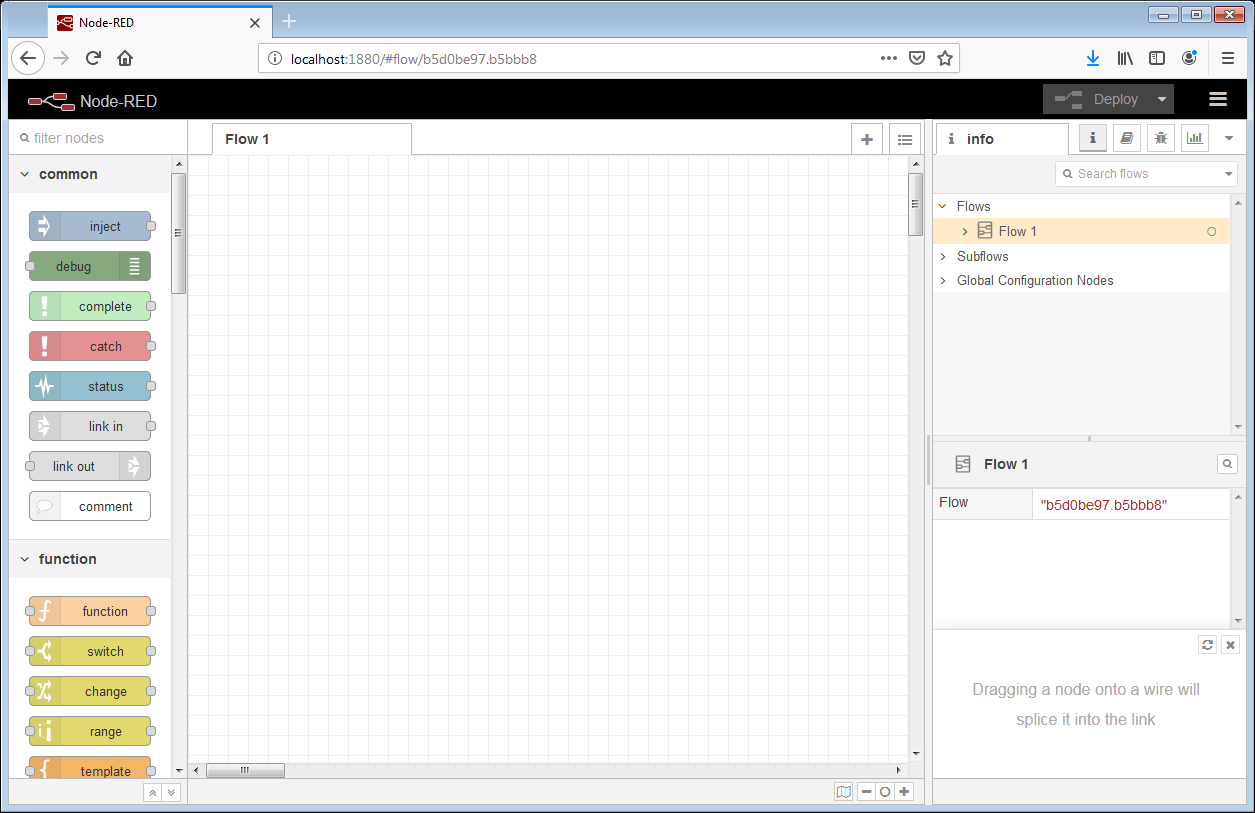
The Node-RED editor can be accessed using an internet browser by typing
http://localhost:1880 or http://127.0.0.1:1880
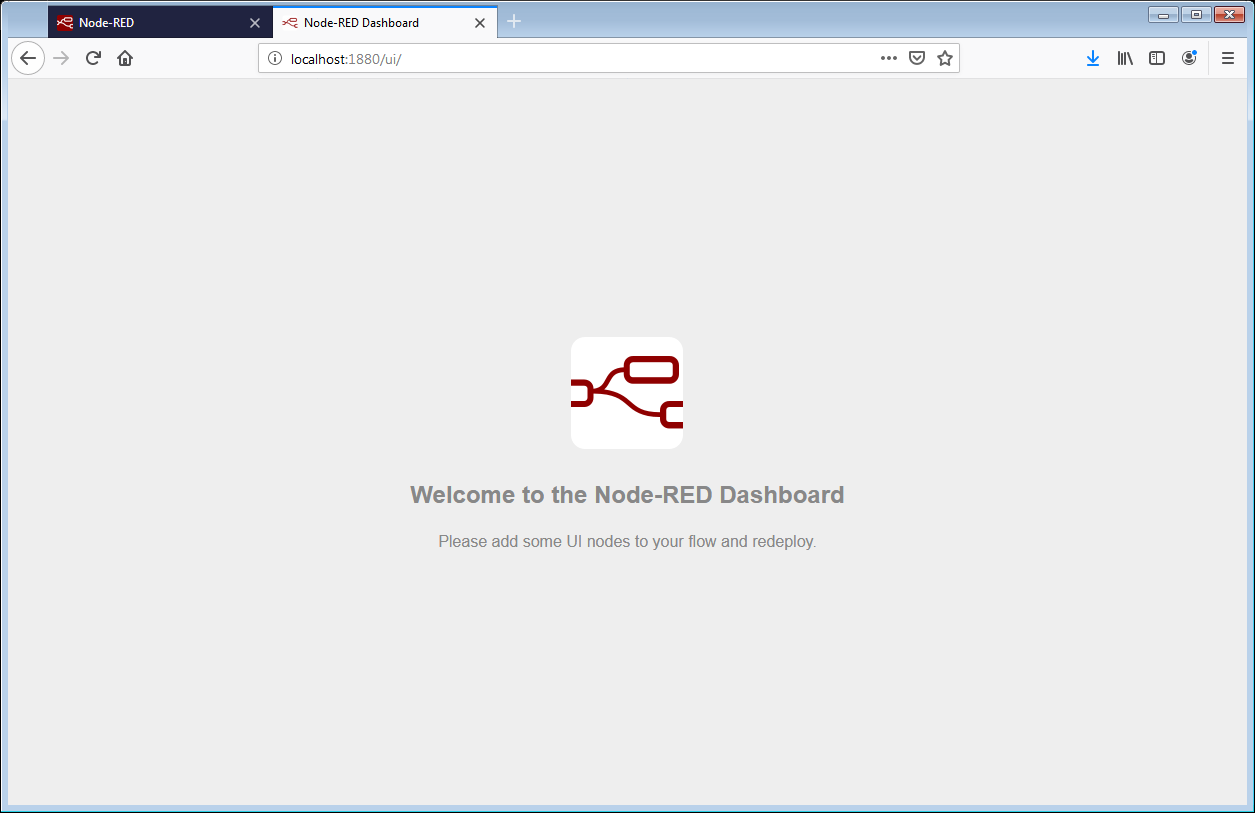
The Node-RED editor will be available at the same address if we add/ui to the end, i.e.
http://localhost:1880/ui or http://127.0.0.1:1880/ui
Please note that, by default, the Node-RED editor is not secured – anyone who can access its IP address can access the editor and deploy changes.
This will not be a problem as long as everything is running on local and trusted network.
For more details on how to secure Node-RED editor and dashboard visit: https://nodered.org/docs/user-guide/runtime/securing-node-red
17.3. Working with projects
On the Node-RED official website, projects are presented as a new way to manage flow files. Rather than treat flows as a simple pair of files, they represent everything you need to create a redistributable Node-RED application.
It is important to know that projects are backed by a Git repository, meaning all of the files are fully version controlled and allow developers to use familiar workflows to collaborate with others.
Working with projects is not enabled by default and this is possible primarily because the git is required to be installed. Information about this can be seen when starting Node-RED:
To enable projects it will be necessary to install git first. Git is also free and open source and can be downloaded from https://git-scm.com/downloads.
More information about the installation is available at https://git-scm.com/book/en/v2/Getting-Started-Installing-Git.
Close Node-RED before starting the Git installation.
For Ubuntu, this PPA provides the latest stable upstream Git version:
sudo add-apt-repository ppa:git-core/ppa
sudo apt update
sudo apt install git
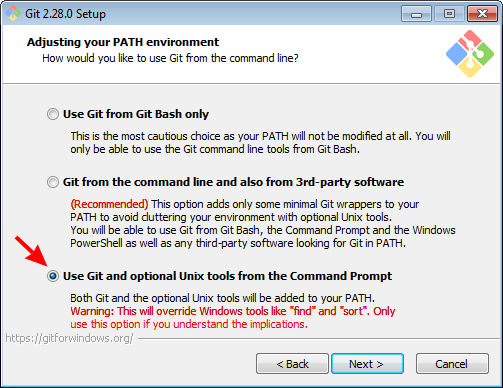
In the case of Windows, you will need to download the installation and run the installation wizard. In principle, you can proceed to confirm all the default options. However, there is a possibility that after installing git you will not be able to run from the command prompt (because its location is not added to the PATH environment variable). If this happens you will need to reinstall Git and select the following option in the Adjusting your PATH environment step:
To check that the git is installed and can be run (i.e. that in the case of Windows the PATH environment variable is correctly modified) it will be enough to type in the command line:
git
The final step to enabling projects is to modify the Node-RED settings.js configuration file.
The location of this file on linux is in the user home folder in the .node-red subfolder. Therefore you can use the following command:
cd ~/.node-red
It’s similar with Windows: look for it in Users\<user name>\.Node-red
In the editorTheme:projects:enabled section within the module.exports block, it is necessary to replace false with true:
// Customising the editor
editorTheme: {
projects: {
// To enable the Projects feature, set this value to true
enabled: true
After saving the change, run Node-RED once again and this time the following dialog will appear in the Node-RED editor (at 127.0.0.1:1880):
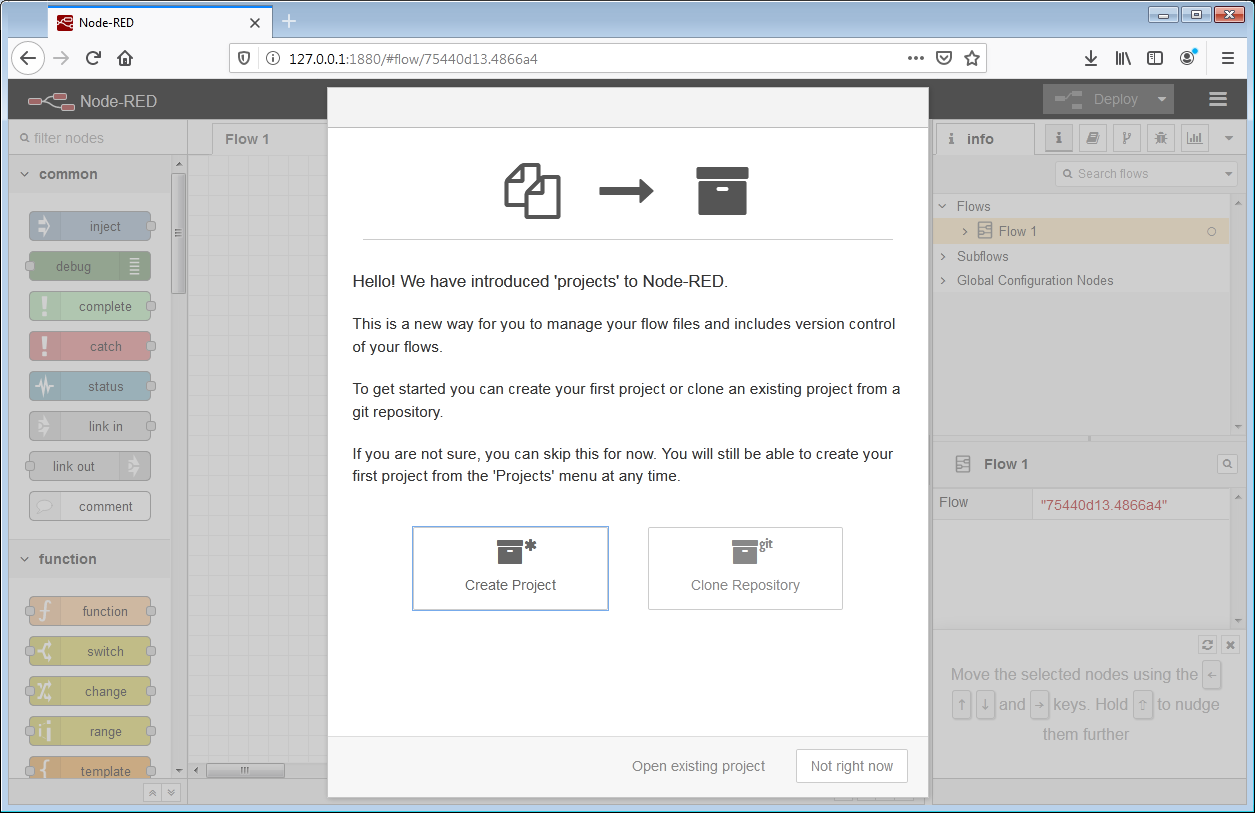
Now we can start making our test flow. Here, select the Create project option and type relay-loop-test as the project name. An empty workspace will open. The available nodes will be displayed in the list on the left. Since there are a large number of them you can use the Collapse or Expand options at the bottom left. In this case, you can get to the desired node by using the Search field at the top left.


The workspace editor allows you to work with multiple tabs and the first tab is called Flow 1. We can change its name as needed. Let’s say we change it to Main. This will require a double click on the tab name (i.e. Flow 1) when a new dialog will open and we can enter a new name.
Since Node-RED editor is a web browser application, it will not be able to right-click on any option.
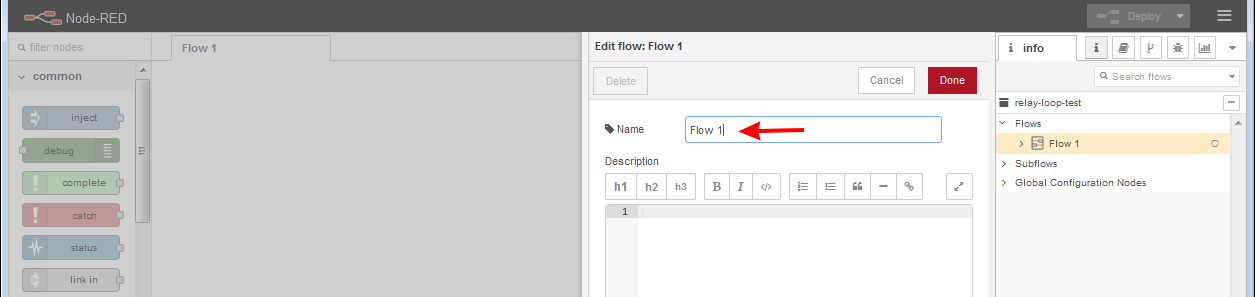
Fig. : Change flow name
17.4. Example scope and features
The scope of this example is to test changing states of one set of relay contacts at the time. The wiring diagram is shown in Fig. 2. One output from the power module (DCP or DCM) will be used to power the relay coil. A DOUT1 output will be used to test the state change, which will be fed to the DIN1 input via the relay contact. To increase immunity to external interference on DIN1 we will use a pull-down resistor.
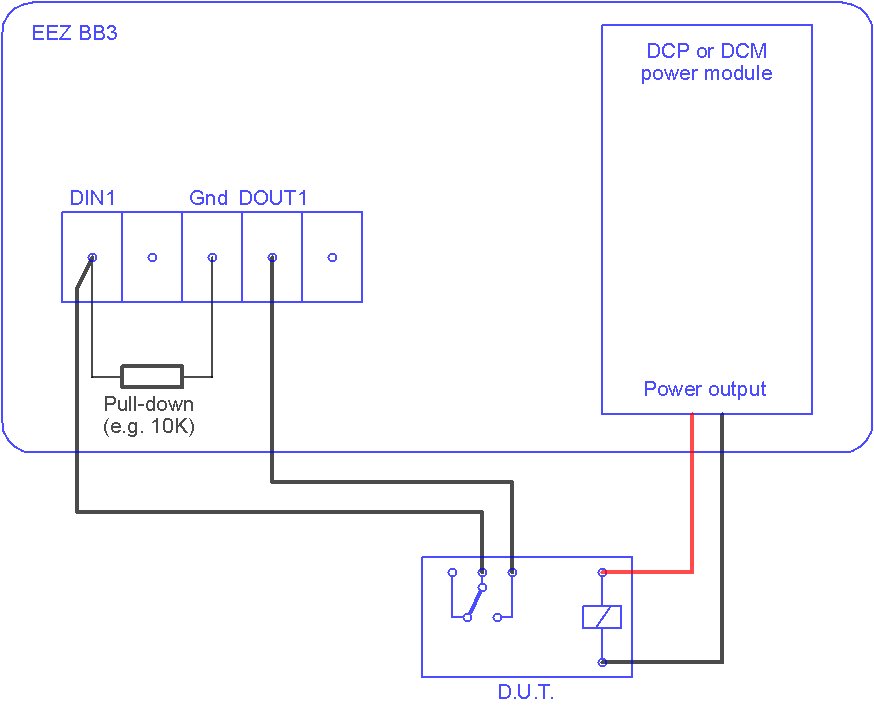
Fig. : Wiring diagram
The Node-RED dashboard will be used to interact with the test flow in which we want to have the following:
- Ethernet connection control
- Module identification in the first slot
- Setting the relay voltage (D.U.T.) and the break between the two tests
- Counters for Passed, Failed and Total number of tests
- Start and stop control and counter deletion
- Graphical display of results
Work in progress