How To – Capture a screenshot from an Rigol DSO (and many other instruments!)
How To – Capture a screenshot from an Rigol DSO (and many other instruments!)
|
Estimated reading time: 5 minutes |
|
EEZ Studio is designed to simplify work with EEZ devices (i.e. H24005 and BB3) but also T&M equipment from other manufacturers. This article will describe how to easily and quickly do the following task: capture screenshots from DSO. Most DSOs have one or more interfaces that allow PC connection. Also, thanks to SCPI commands, it is possible to initiate screenshot capture and transfer the image to a PC. In this article, we will show the following:
- How to install EEZ Studio
- How to add an instrument that is directly supported in EEZ Studio (Rigol DSO) and establish a connection
- Capture the screenshot using the commonly supported DISPlay:DATA? command
- Add comments to the screenshot
- Using a scrapbook
- Save captured screenshot to local disk and clipboard
- Add a generic instrument and capture the screenshot
EEZ Studio installation
EEZ Studio is a free and open source cross-platform application that can be downloaded from the GitHub repository where you can find several installation packages for Linux, Mac and Windows (Fig. 1). After the installation is complete on first run, a SQLite database will be created that is used to store all communications with the instruments including measurement data.
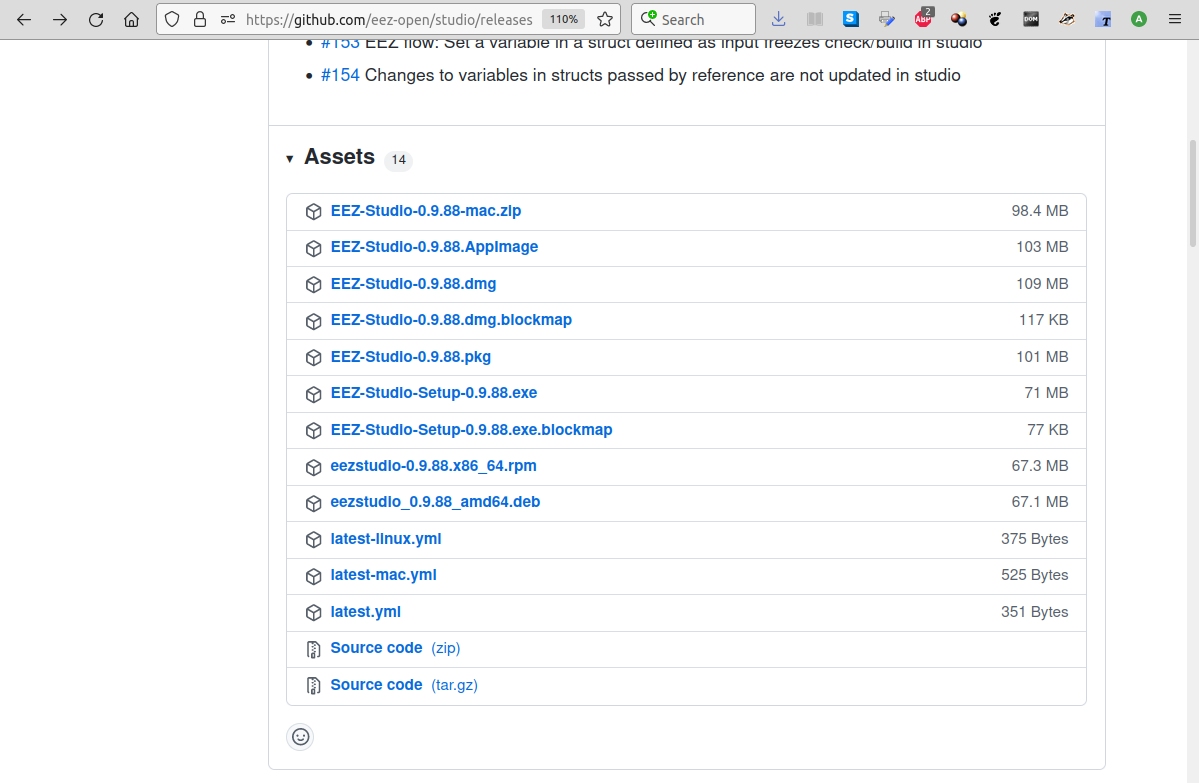
Fig. 1: EEZ Studio installation packages on GitHub
Adding a new instrument
Once the database is created, a selection of all currently supported instruments will be displayed (Fig. 2). We will choose to add Rigol DSO as a new instrument and wait for the so-called instrument extension (IEXT) to be installed.
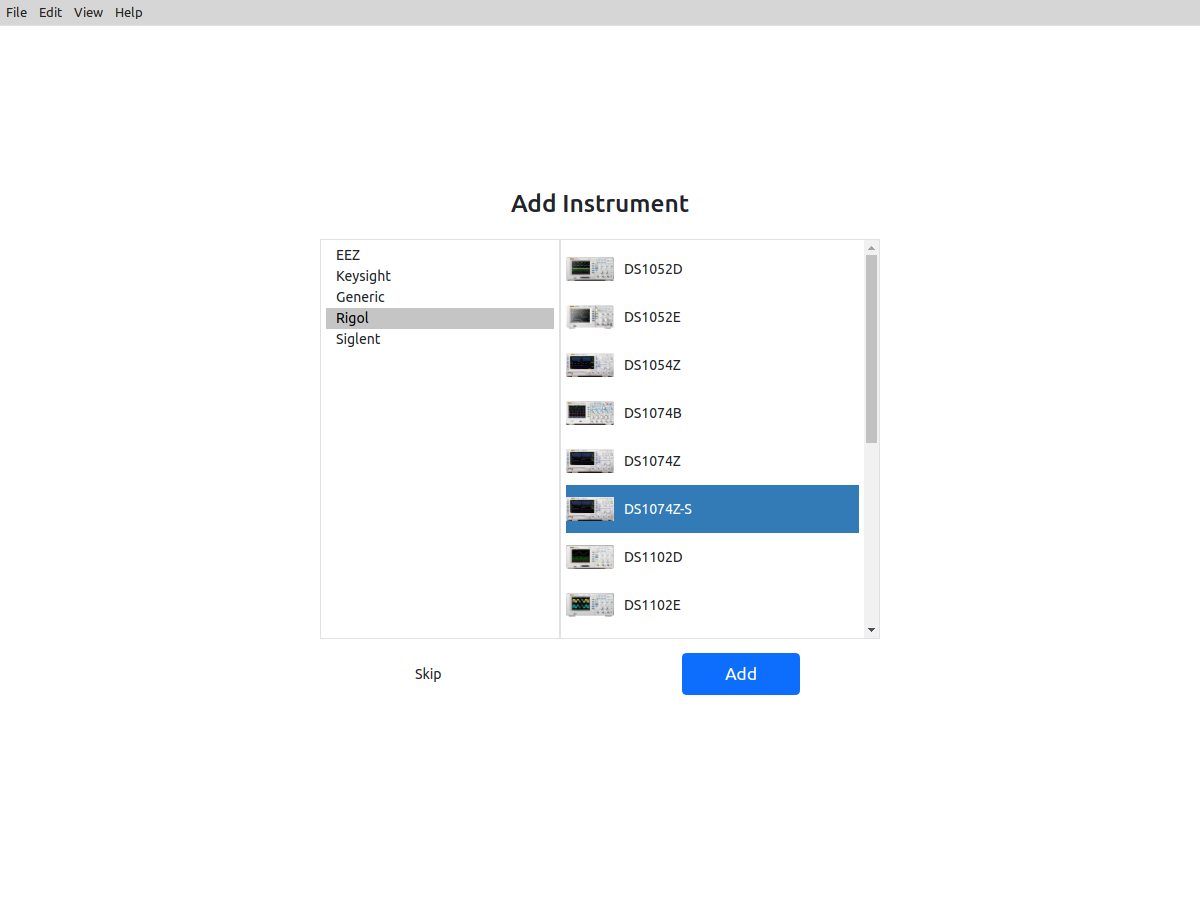
Fig. 2: Adding a new instrument
After the instrument is successfully installed, its terminal tab will be displayed through which we will be able to communicate with the instrument.

Fig. 3: Newly added instrument terminal tab
The next step will be to connect to the instrument. In our case we will use the telnet protocol via the Ethernet interface. To do this, we will use the Connect button, select the Ethernet as Interface, and enter the IP address assigned to the instrument as the Server address. The Port number is automatically assigned as configured in the instrument extension.

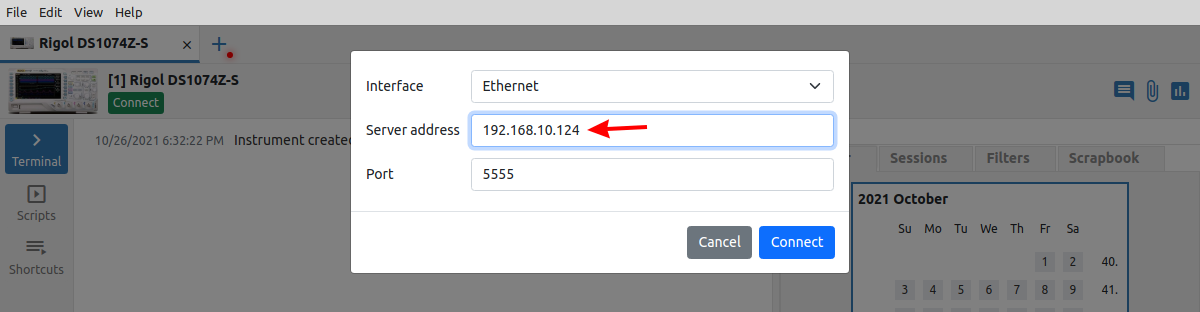
Fig. 4: Establishing a connection to the instrument
If the connection was successful, information will appear that the connection has been established and EEZ Studio will automatically send a SCPI query (*IDN?) to obtain the instrument identification. A display of the instrument response will follow (Fig. 5).
IEXT for Rigol currently supports Ethernet (Telnet), USBTMC and VISA interfaces. Please note that USBTMC and VISA are experimental. Furthermore, the USBTMC driver for Linux does not seem to support the newer hi-speed USB host controllers due to bug in Rigol firmware. Therefore you have to use USB 1.x isolator to limit the speed to FS (12 Mbps) rate.
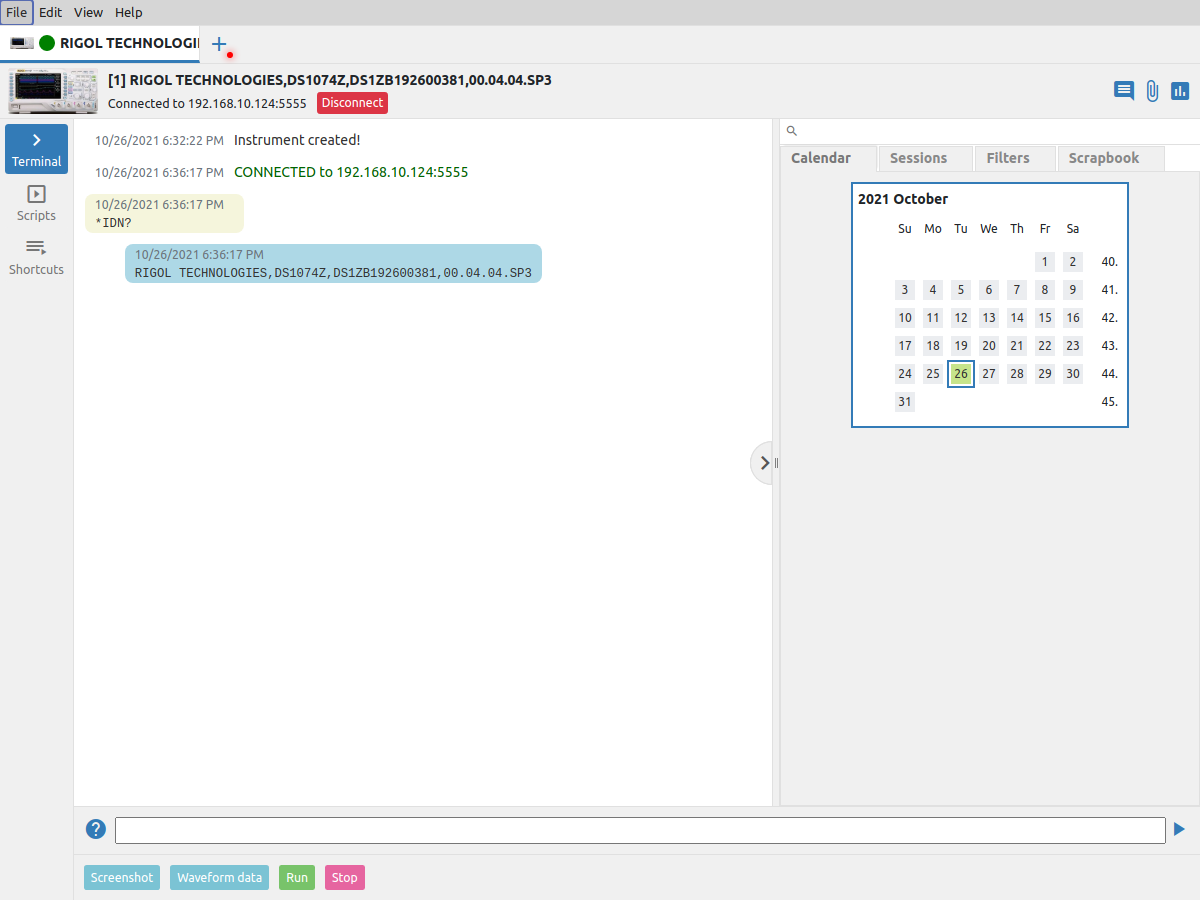
Fig. 5: The connection to the instrument has been successfully established
Capturing a screenshot
We are now just one click away from capturing the screenshot: at the bottom of the Terminal tab among the predefined shortcuts we will only need to select Screenshot.

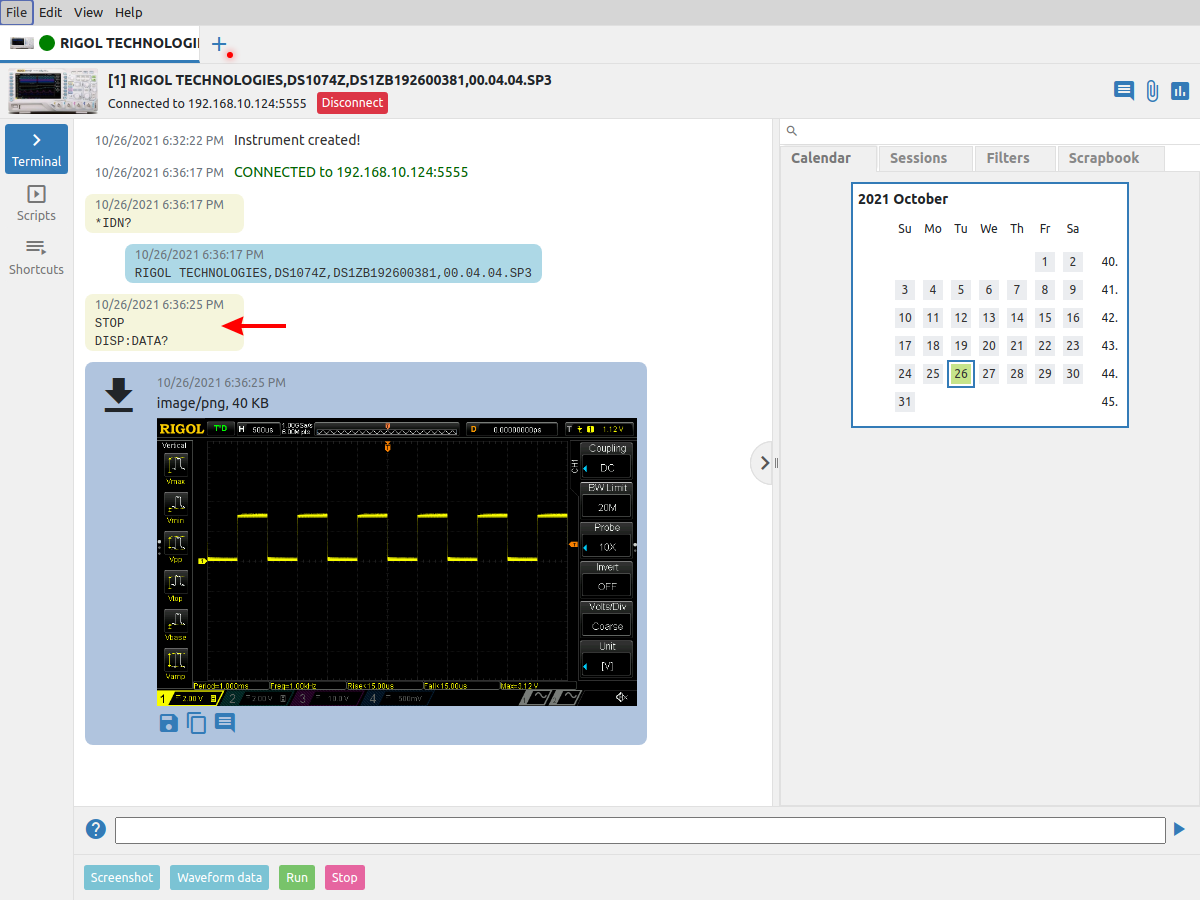
Fig. 6: Captured screenshot
The selected shortcut will actually send two SCPI commands: STOP and DISP:DATA? (Fig. 6) and wait for the instrument to respond. The received data will be interpreted as an image and its preview will be displayed. Clicking on the image preview will display a maximized screenshot (Fig. 7).

Fig. 7: Maximized screenshot view
Working with screenshots
As already mentioned, EEZ Studio uses SQLite to store all data, including screenshots and the date/time they were captured. This opens up the ability to group and easily navigate through a large number of screenshots using the “heatmap” shown in the Calendar tab on the right.
However, grouping by date will often not be enough. Some description of the content of the screenshot would certainly significantly speed up a successful search. For this reason, a Note option has been added below each image (Fig. 8).
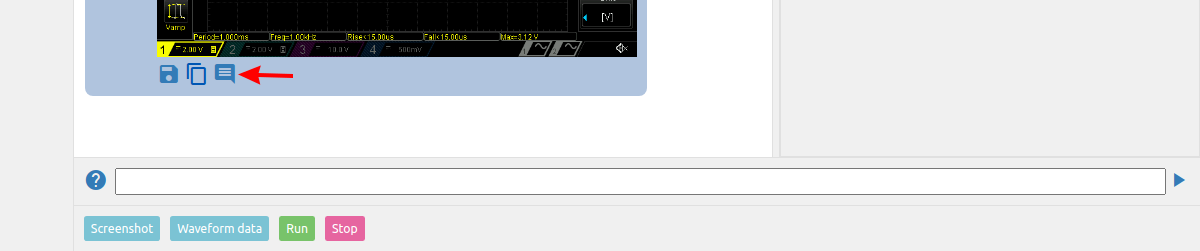
Fig. 8: Image adding note option
Selecting this option opens the edit form as in Fig. 9. The editor allows basic formatting of the note text, as well as adding URLs. A successfully added note will be displayed below the screenshot as in Fig 10.
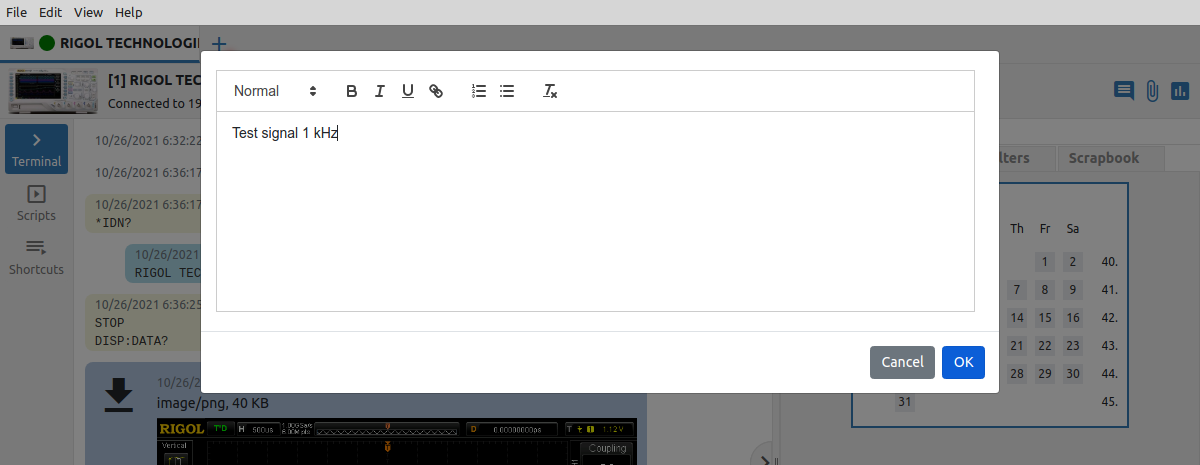
Fig. 9: Add a note to the screenshot
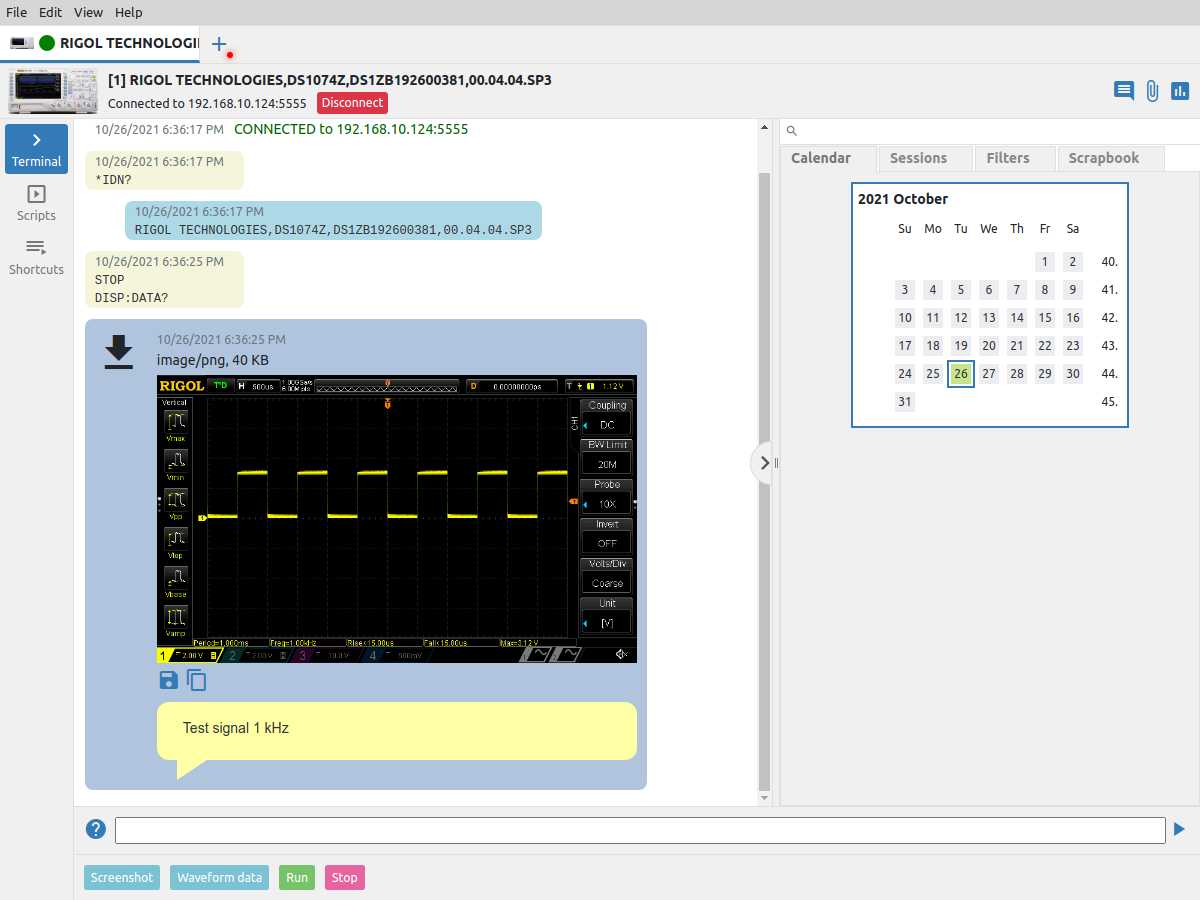
Fig. 10: Note added to the screenshot
Added notes will be editable or deleted using the options that appear at the right end of the note on mouse hover over the note (Fig. 11). The editor can also be accessed directly by double-clicking the note.

Fig. 11: Note edit and delete options
Now, since the screenshot has a note, it will be possible to find it by typing the text from the note. For example, if we enter only the test, a new Search results tab will be displayed on the right side, which will display a link to the screenshot that has the word in the note (Fig. 12).
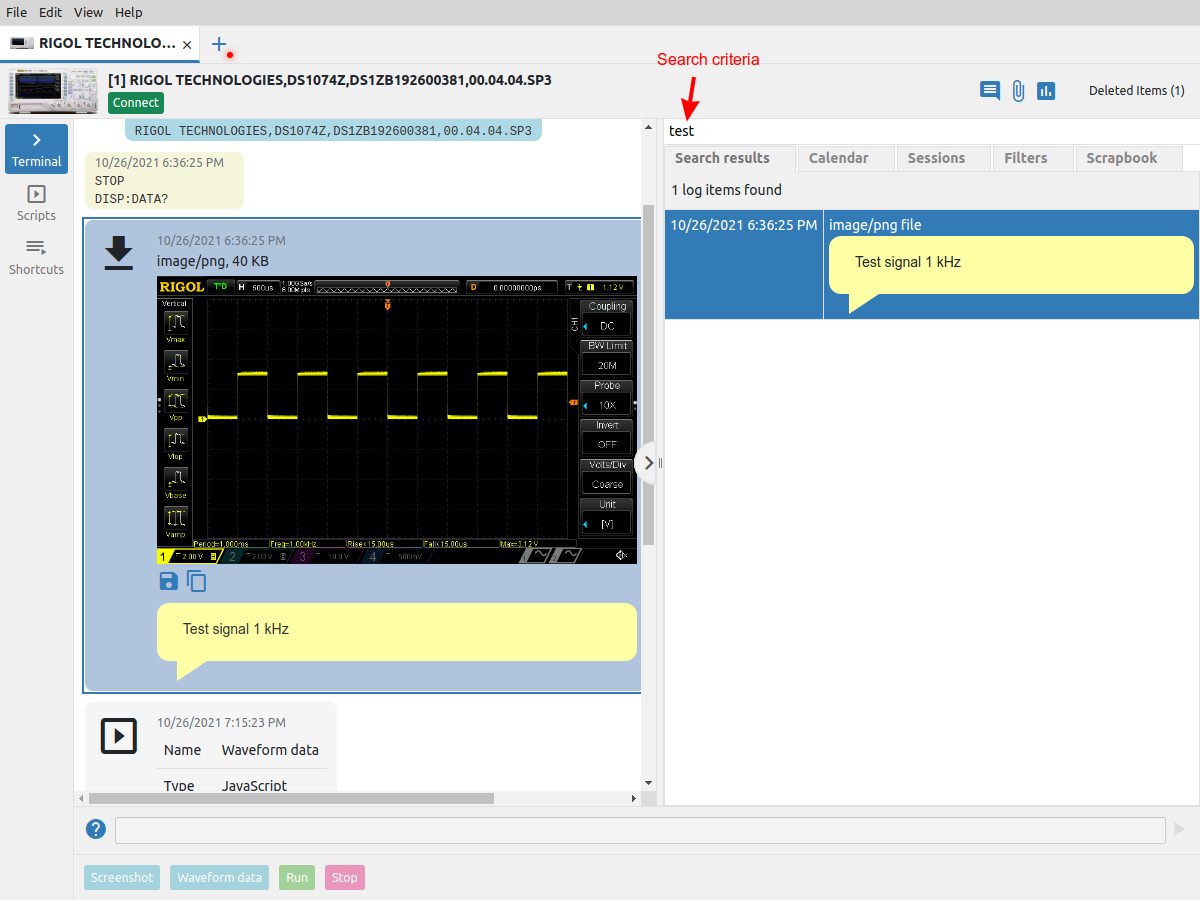
Fig. 12: Search using text in notes
In more serious work, the number of screenshots can easily grow to several thousand over time. This will also make it difficult to find them even if notes are added in a disciplined manner. For this reason, a scrapbook has been added, thanks to which a collection of important screenshots can be created. The screenshot is added to the scrapbook with drag & drop (Fig. 13) and can stay there as long as needed.

Fig. 13: Add a screenshot to the Scrapbook
Clicking on the screenshot in Scrapbook will maximize it. Right-clicking opens a menu with options for positioning in the instrument terminal history and for deleting from the Scrapbook (which will not delete the screenshot from history).
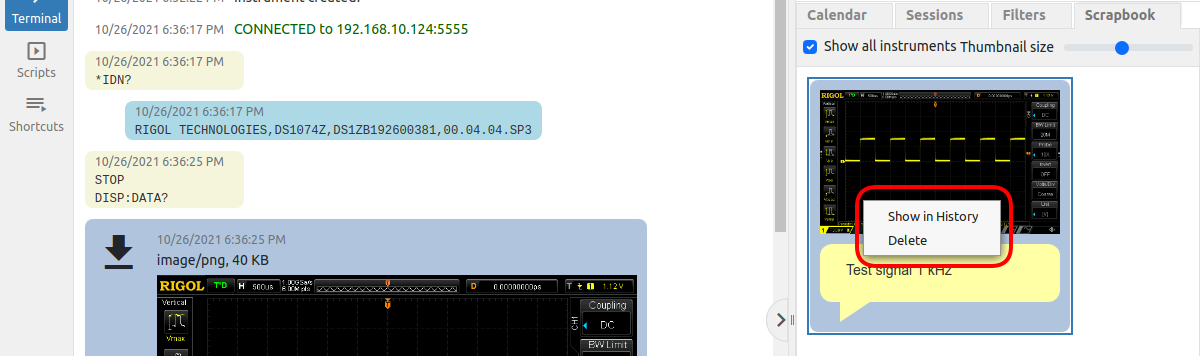
Fig. 14: Scrapbook item options
Deleting screenshots as well as other items from the instrument history (i.e. Terminal tab) is done by using the Delete selected history items option in the upper right corner (Fig. 15) or the Del button after selection.
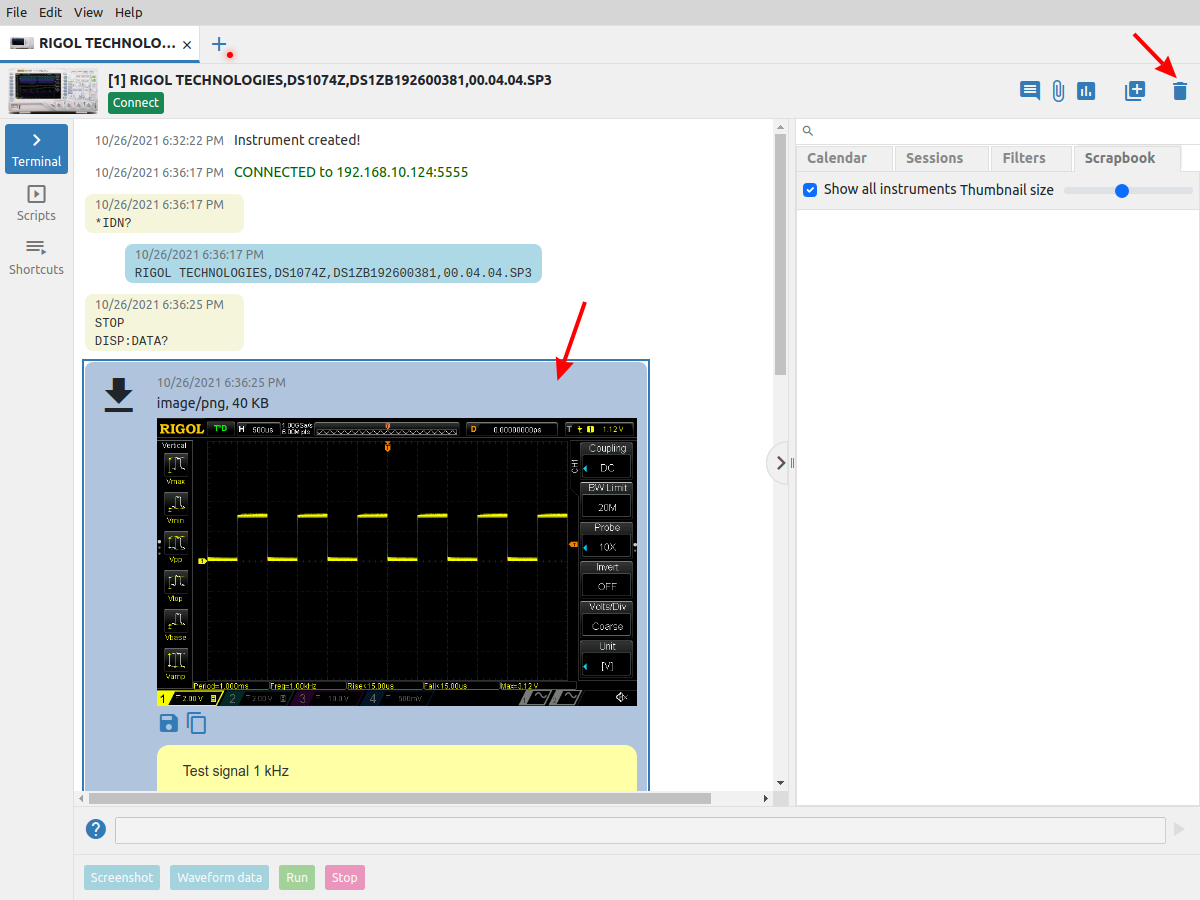
Fig. 15: Delete selected screenshot
If there are one or more deleted items, a new option will appear in the upper right corner: Deleted items with an indication of the number of items in the trash.

Fig. 16: Deleted items
Clicking on this option displays all items in the trash as well as the Empty trash option. It is used to permanently delete all items from the trash.

Fig. 17: Empty trash option
In case the item from the trash wants to be restored, it is necessary to select it when the Restore selected history items option appears (Fig. 18).
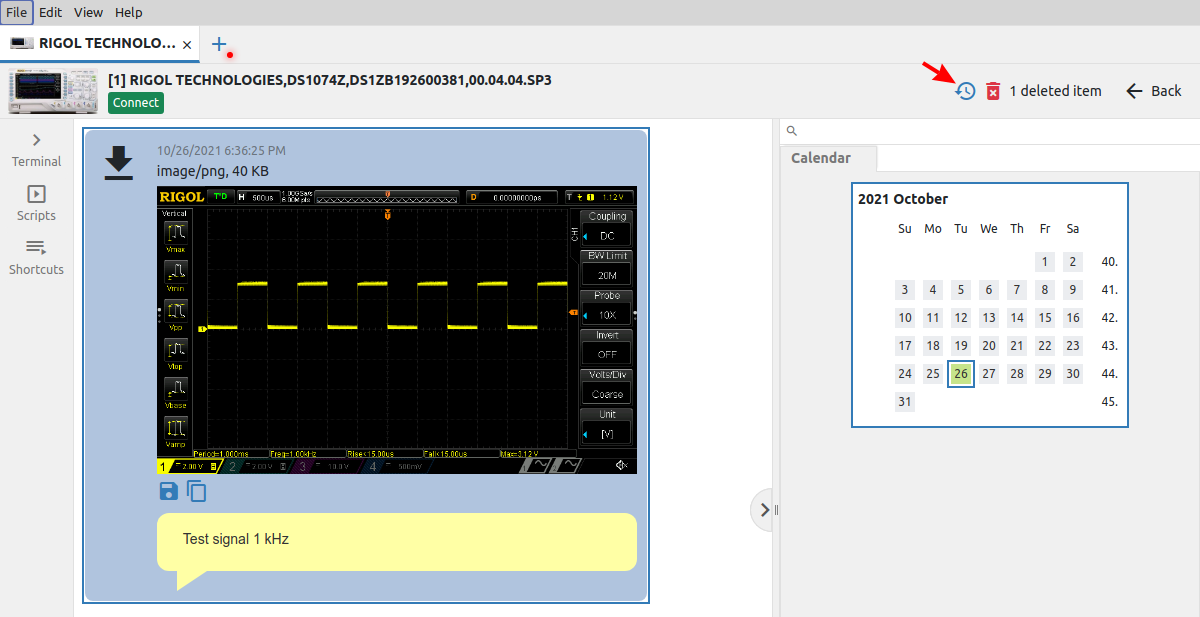
Fig. 18: Restore item from trash
Finally, the screenshot can be saved to local storage as a file using the Save file option. It is also possible to copy it to the clipboard using the Copy to clipboard option and transfer it to another application.
Capturing screenshots for a generic instrument
EEZ Studio currently comes with support for several Rigol and Siglent instruments. However, that does not limit us to use it with other instruments as well. In this case, Generic SCPI IEXT can be used which has support for Ethernet, Serial, USBTMC and VISA interfaces.
EEZ Studio has been tested with R&S®VISA which can be downloaded here or here.
It is always possible to add a new instrument by displaying the Workbench in the new tab (Fig. 19) and selecting the Add instrument option (Fig. 20).
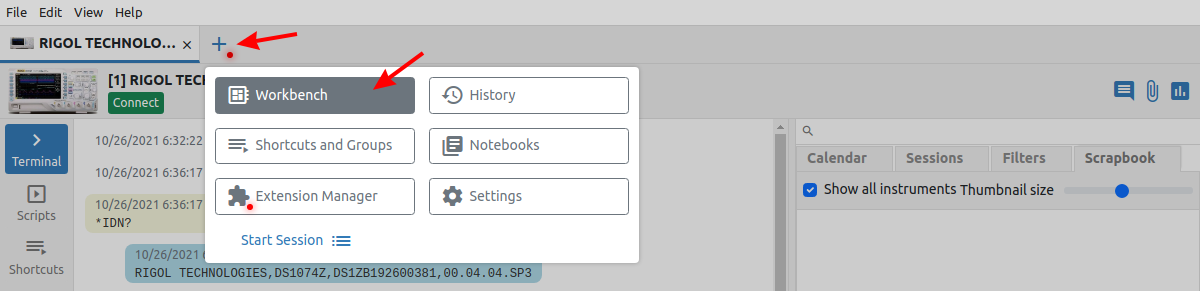
Fig. 19: Display Workbench for adding new instrument

Fig. 20: Add new instrument
From the list on the left, select Generic and on the right SCPI and confirm with Add.

Fig. 21: Select Generic SCPI instrument extension (IEXT)
The newly added instrument will be displayed on the Workbench. To open its Terminal you can use double click on the thumbnail of the instrument or the option on the right side of the screen.
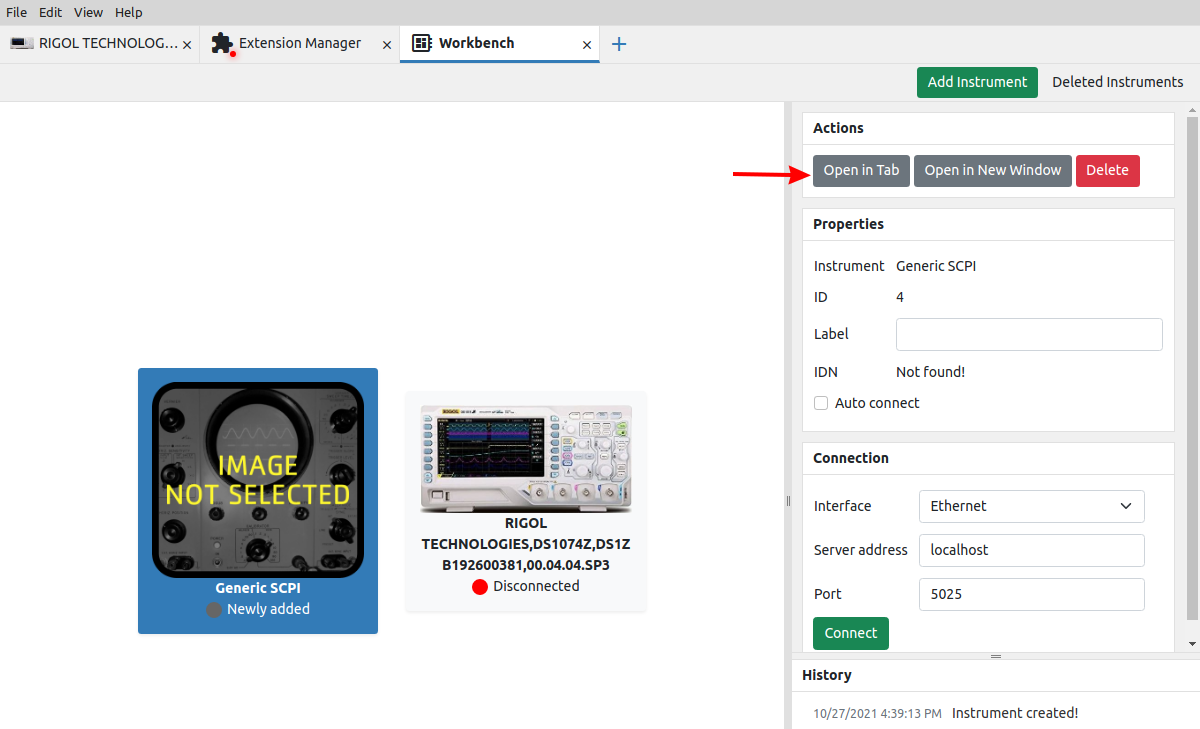
Fig. 22: Open new added instrument
The terminal of the new instrument will be displayed as in Fig. 23.

Fig. 23: Generic SCPI instrument terminal
We are now ready to connect to the instrument. In our example, we will still use the same Rigol DSO, but it could be any another instrument. This time we will connect using the VISA interface.
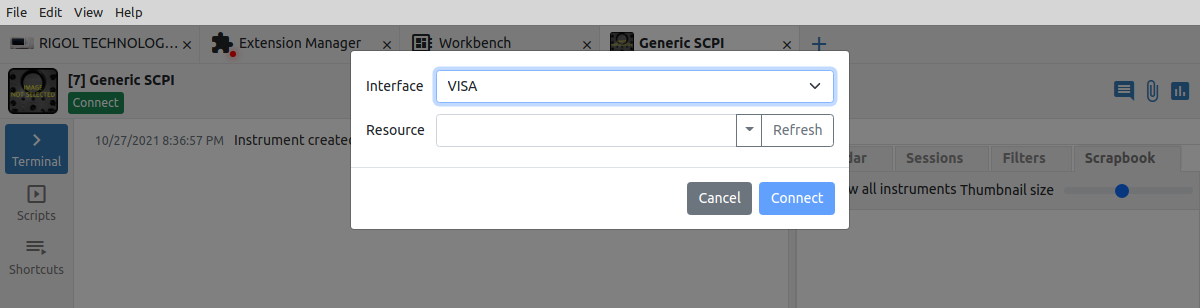
Fig. 24: Select the VISA interface
A VISA resource can be detected by clicking the Refresh button. However, depending on the instrument, this will not necessarily result in the resource connecting string appearing in the combo box list. In our case if Rigol DSO is connected with a USB cable (i.e. USBTMC) VISA will be able to recognize the connection string (Fig. 25). In case this does not happen, it will be necessary to read the connection string on the side of the instrument and write it manually in the Resource input field.
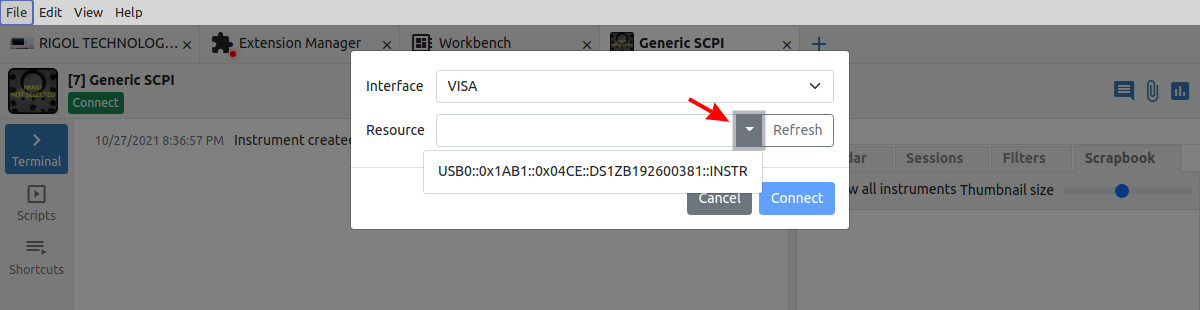
Fig. 25: List of detected VISA connection string
Once we have successfully connected we can directly type the SCPI query to capture the screenshot: DATA:DISPlay? or just DATA:DISP? (Fig. 26) and after a few moments a screenshot will appear (Fig. 27).
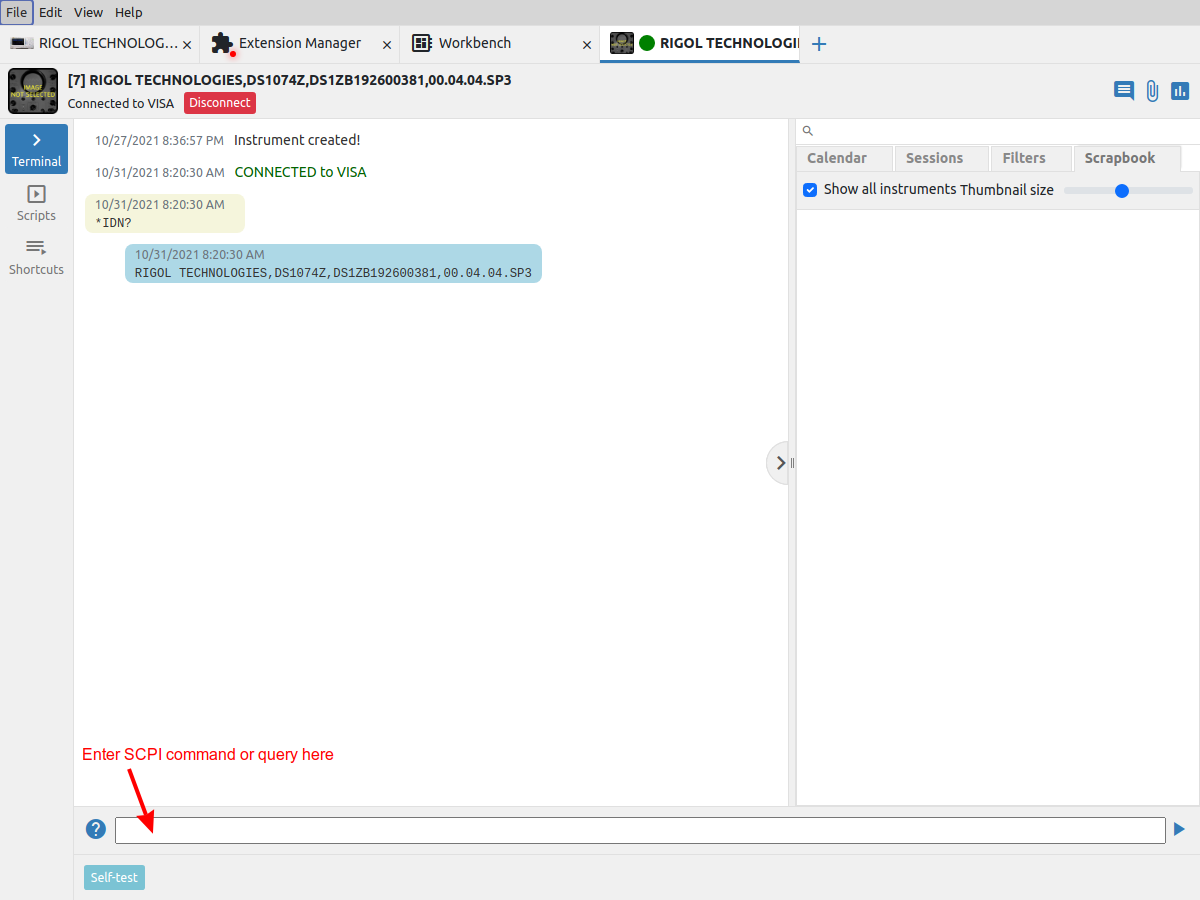
Fig. 26: Instrument is ready to accept commands
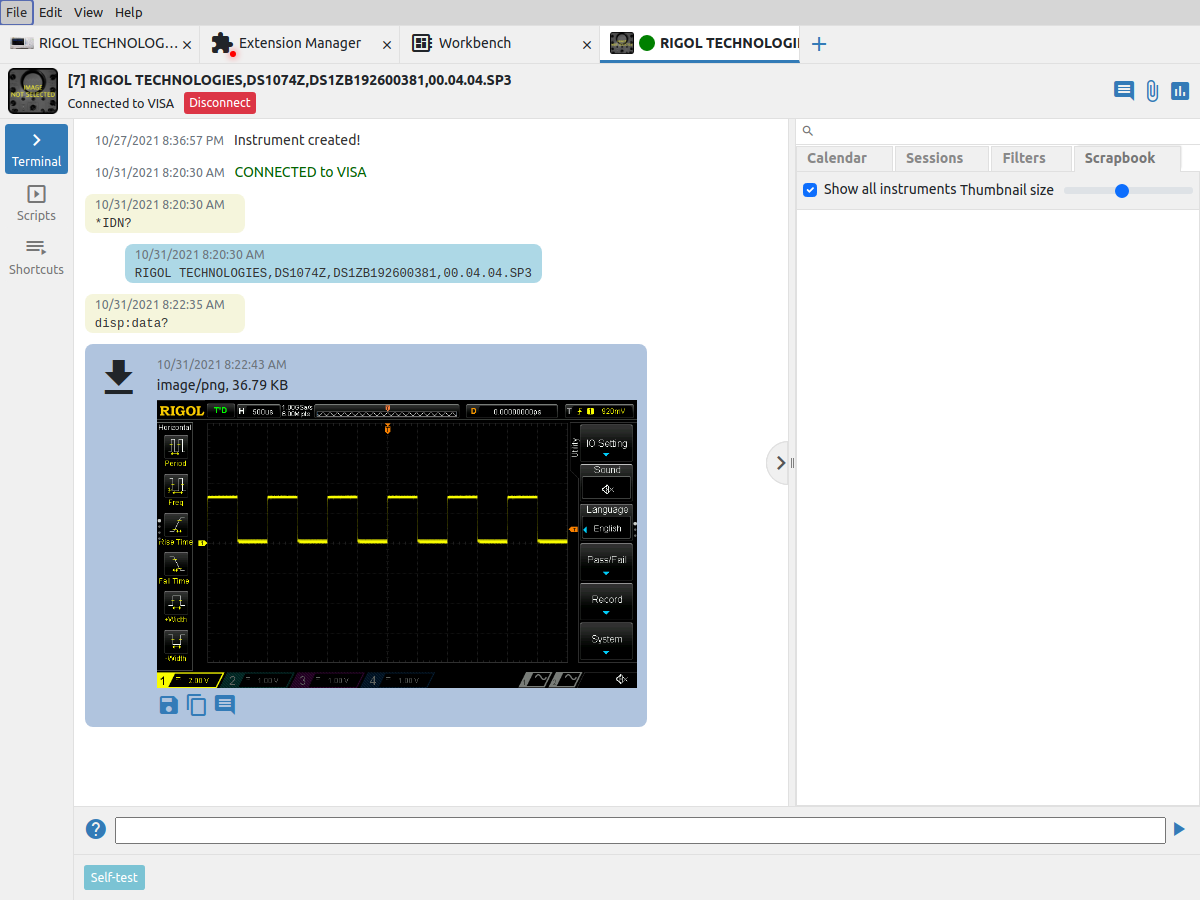
Fig. 27: Screenshot captured using the DISP:DATA? query
For instruments that do not support DISPlay:DATA? query can you try HCOPy:SDUMp:DATA? as is the case with the Siglent VNA1015X.
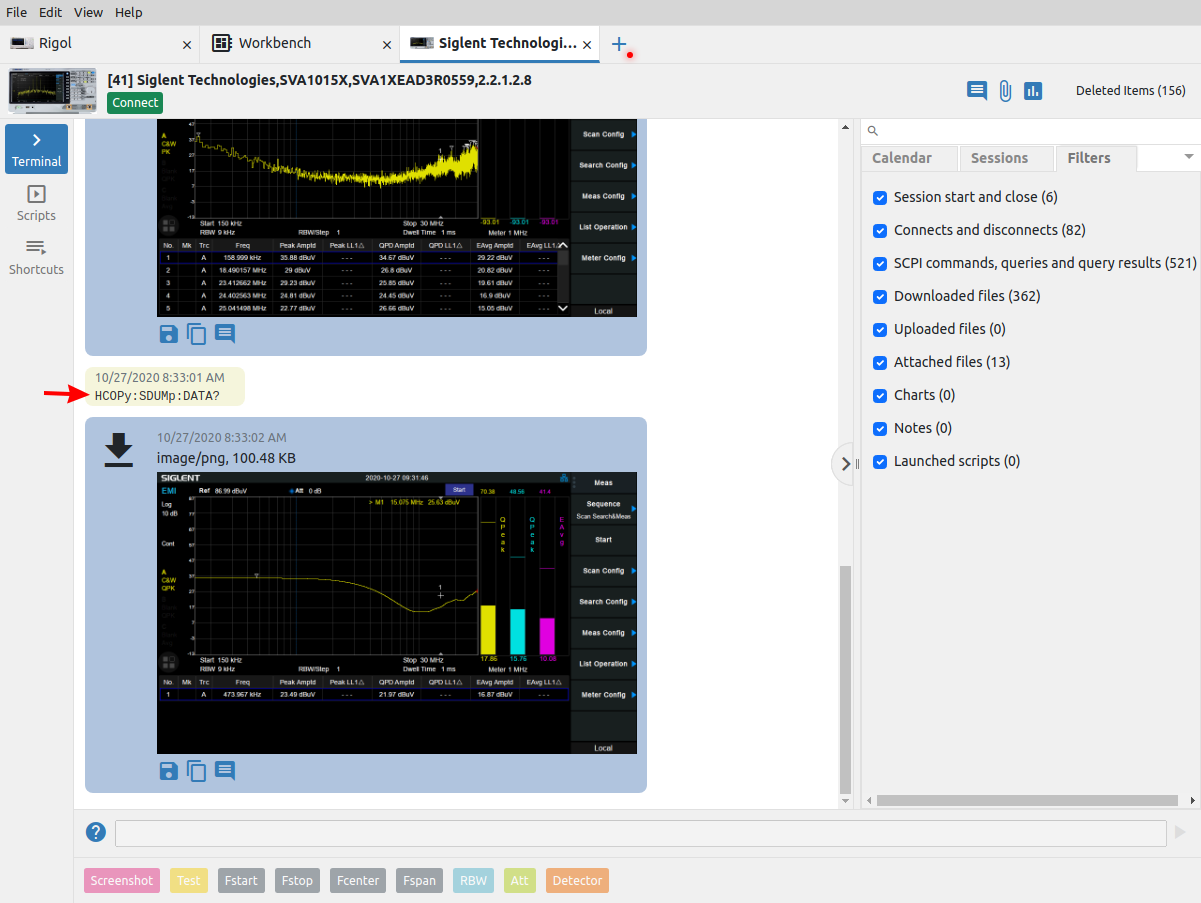
Fig. 28: Screenshot captured using the HCOP:SDUM:DATA? query
EEZ Studio is still in development and you may encounter various issues. Thanks in advance to everyone who will invest some time and test EEZ Studio with their instruments. Feel free to report issues using GitHub issue tracker, your feedback will help us make it better and useful for as many instruments as possible.